.jpeg)

In this guide, we explore the challenges and techniques of transforming AI-generated images into stunning high-quality prints as we test some of the most popular upscaling options.
Disclaimer
There are many ways to upscale an image, and it's not this study's goal to cover all of them. I will, however, try some of the most popular options, both free and paid.
After considering each option's speed, quality, and user experience, I settled on using Gigapixel AI. Despite a hefty 99,99$ price tag, my time and mental health seemed more valuable. ¯\_(ツ)_/¯
Someone with a stronger will, more dedication, time, and a technical mindset could squeeze better results out of some of the methods in this study. For instance, selecting a correct Upscaler model can drastically affect the upscaling outcome. But going through lists of literally hundreds of them, let alone downloading, installing, and waiting between ten to ninety minutes to see each result—that's a task for a dedicated research institute. :) Instead, I went with the most common models and (mostly) default values in most cases.
Trial Subjects and Benchmark
The five upscalers that I put to the test for this study:
SuperRes Diffusion colab (via Google Colab)
chaiNNer (stand-alone app)
Upscayl (stand-alone app)
Gigapixel AI (stand-alone app, PS+LR plugins)
Adobe Photoshop Super Zoom (PS plugin)
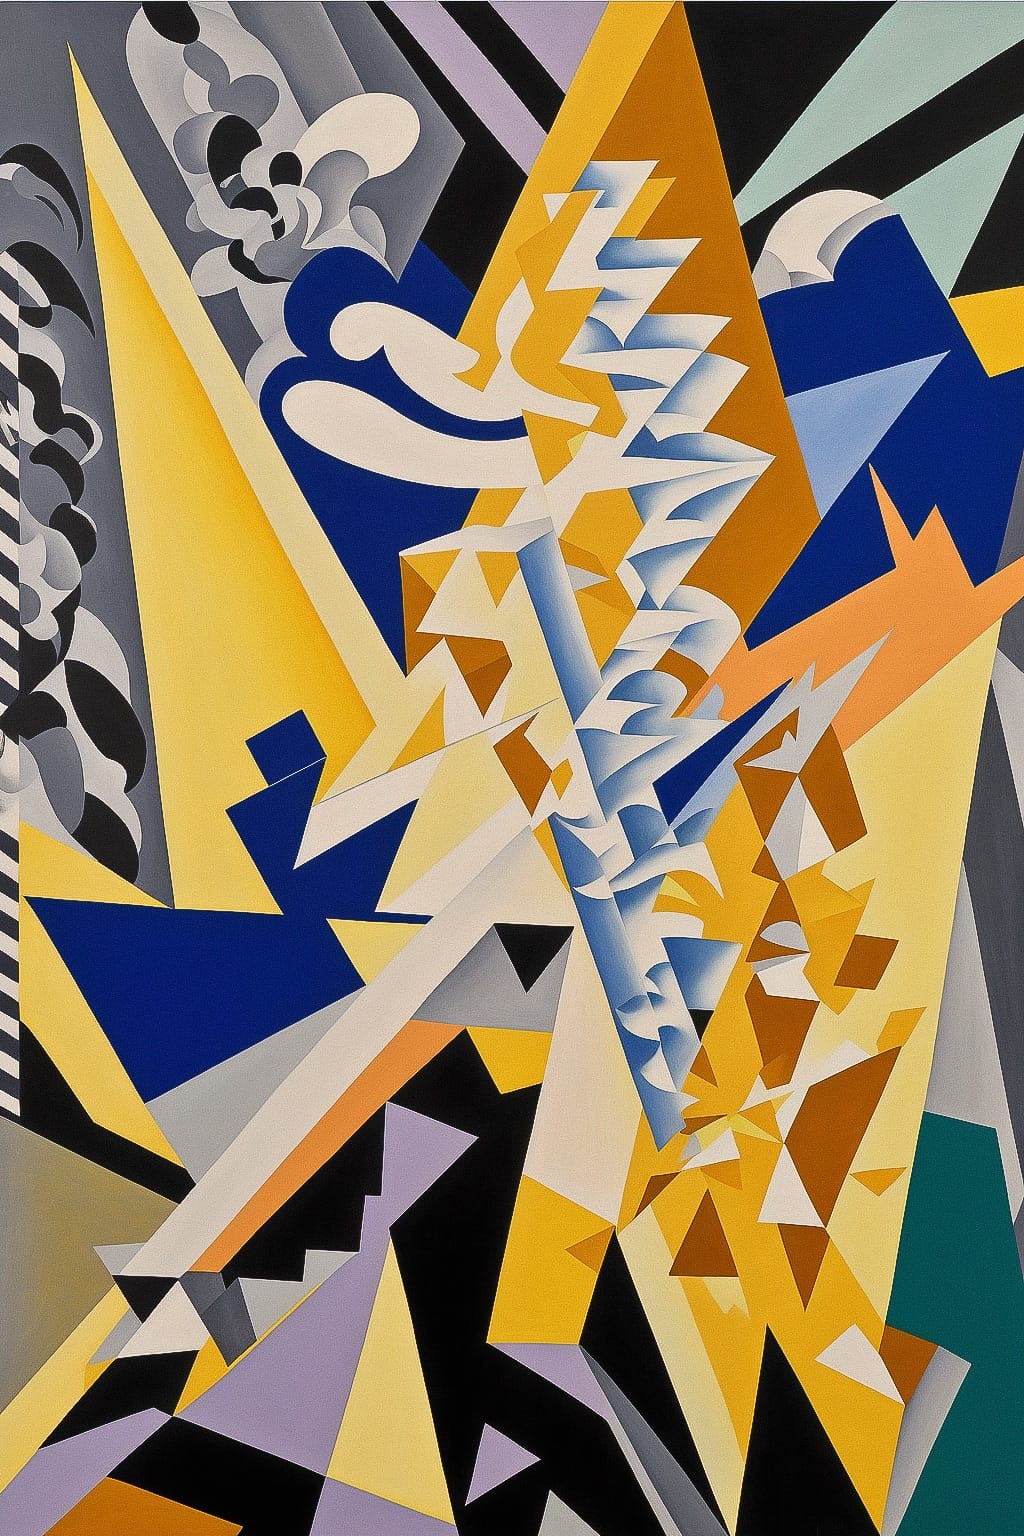
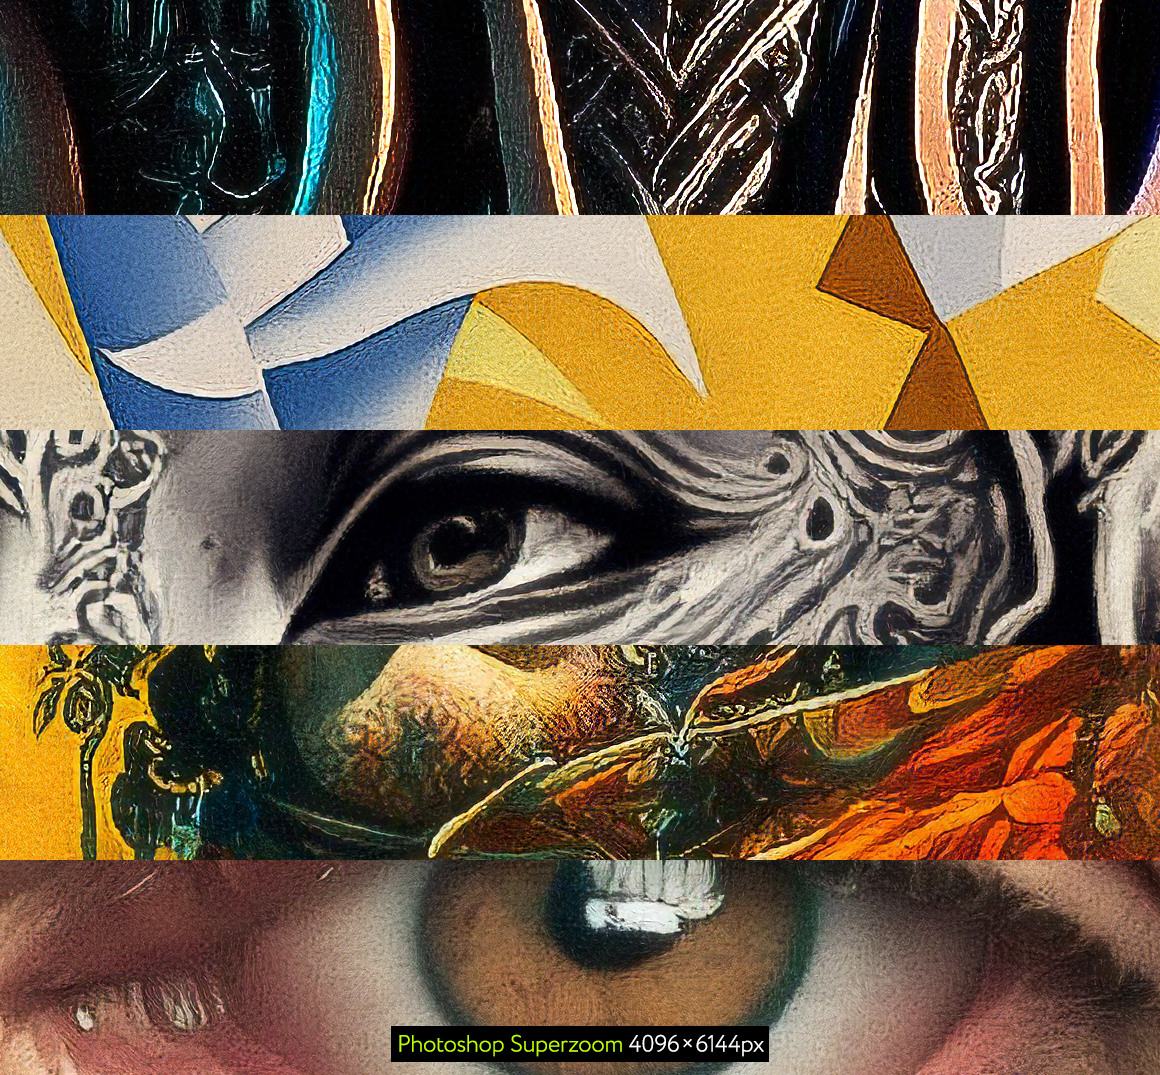
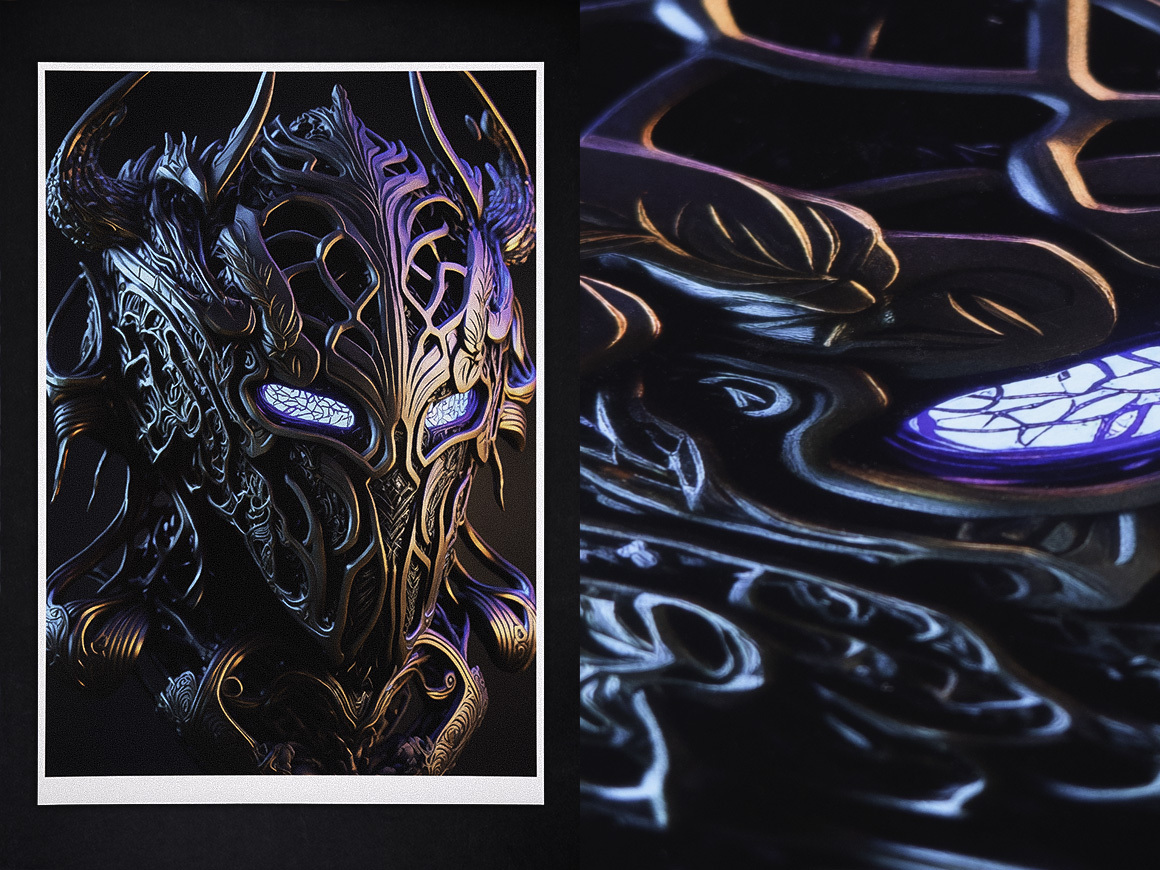
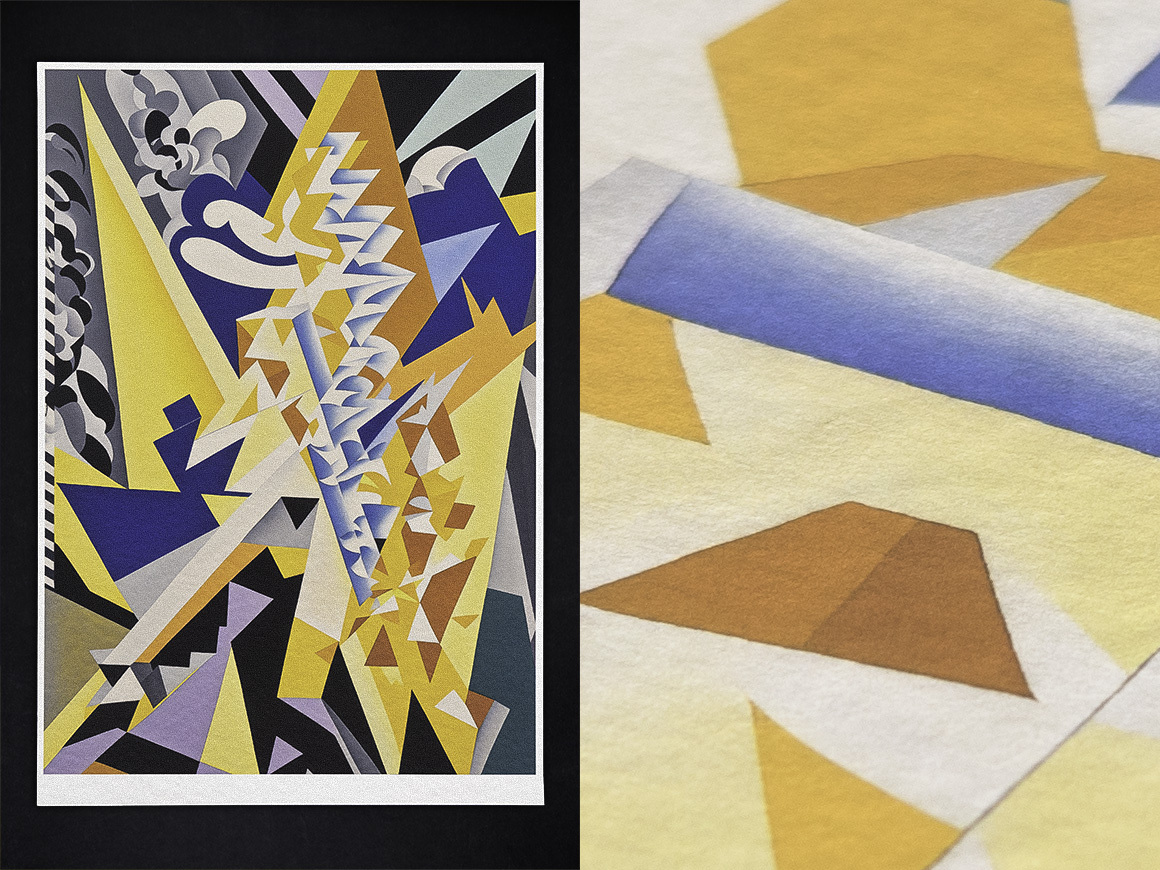
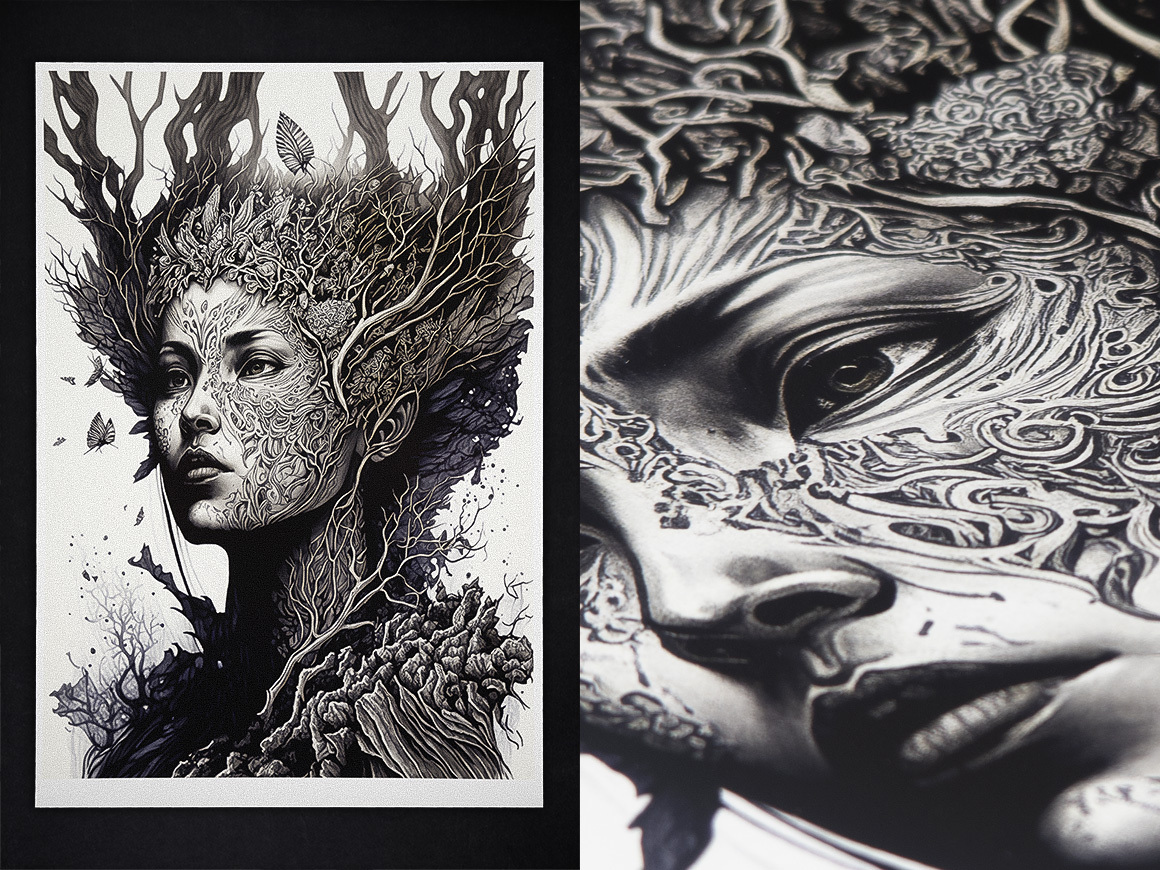
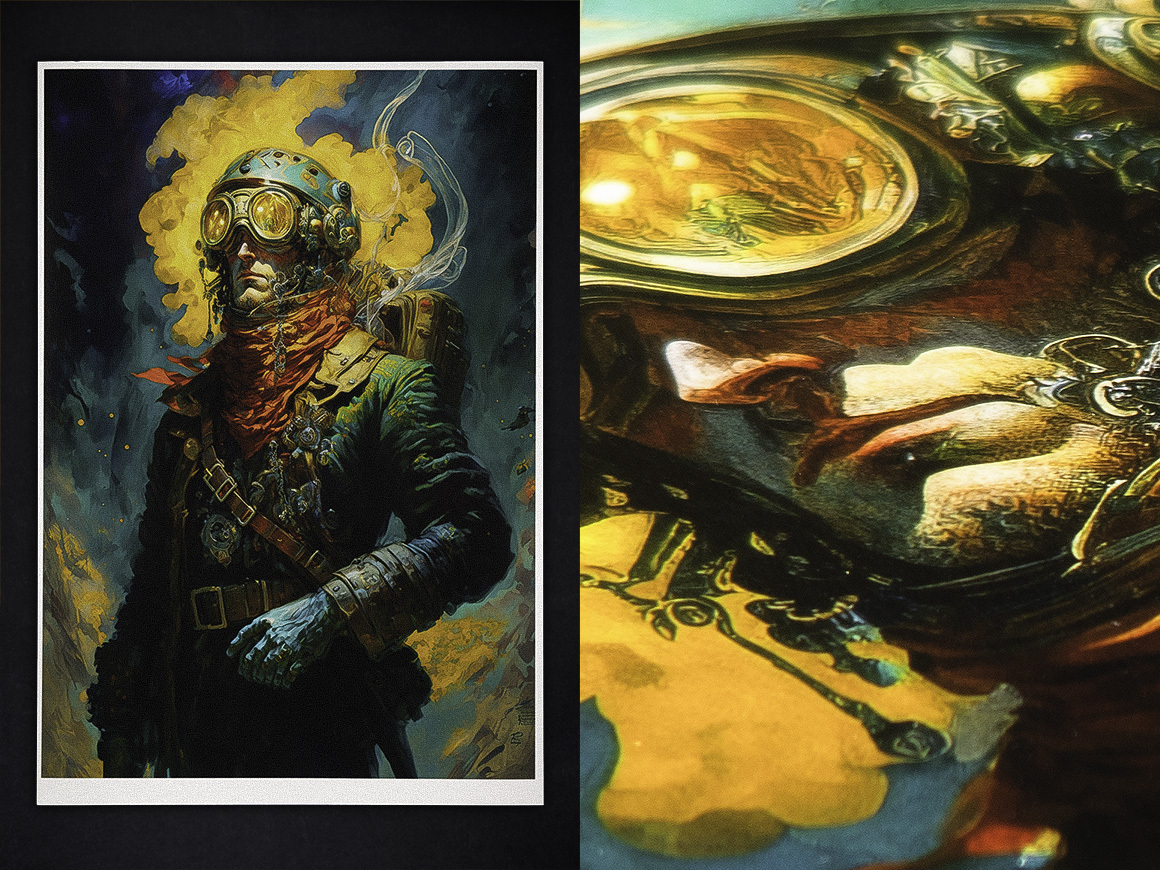
For the benchmark, I asked Midjourney to generate five images of various kinds:


Technicalities
All the initial files were sharpened in Lightroom before sending them to upscalers. After LR export (HQ PNG), each file was ~9 Mb and 1024×1536px.
For printing, keeping files as PNG isn't necessary—JPEG with lowest compression works perfectly fine. But I kept the initial file format to make the experiments more consistent.
We ran all tests (except for Google Collab that works in a cloud) on 2013 Mac Pro with the following configuration: 3,5 GHz 6-Core Intel Xeon E5, 64 GB 1866 MHz DDR3, AMD FirePro D500 3 GB.
1. Topaz Gigapixel AI
My upscaler of choice for many good reasons—Gigapixel AI—is an all-in-one AI-based upscaler with a buy-once-own-forever license. When you launch the app, it offers to download the most recent upscaler models. Afterward, it will regularly download updates and occasionally add new models.
Gigapixel AI offers a minimalist and clean interface. Every control is in its place, and the overall experience is straightforward and intuitive.
A handy Auto mode lets Gigapixel AI decide which model best applies to your images and with what parameters. Or you can set everything manually. That includes Suppress noise, Remove blur, Fix compression, Face Recovery, and Gamma Correction.
To help you with these choices, the central part of the screen is occupied by a before-after comparison preview. You can zoom in and out and drag the loupe across your image. The preview only runs the selected upscaler model on the zoomed part of the image, so it works faster than complete upscale—to show how this particular fragment will look after you launch the upscaler.
Finally, you choose where and how you want the upscales saved and hit Save images. Voìla, done!
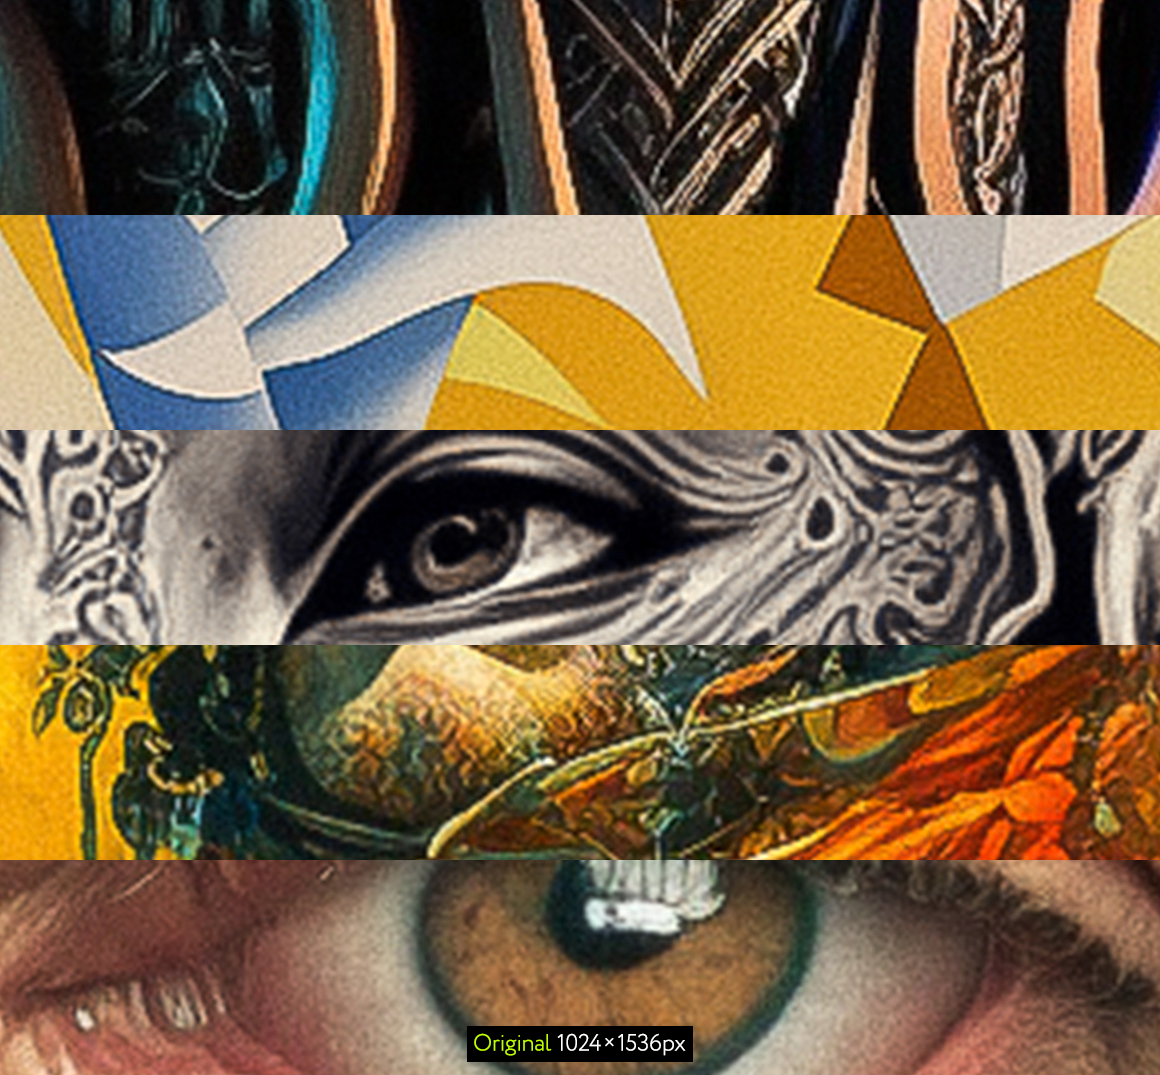
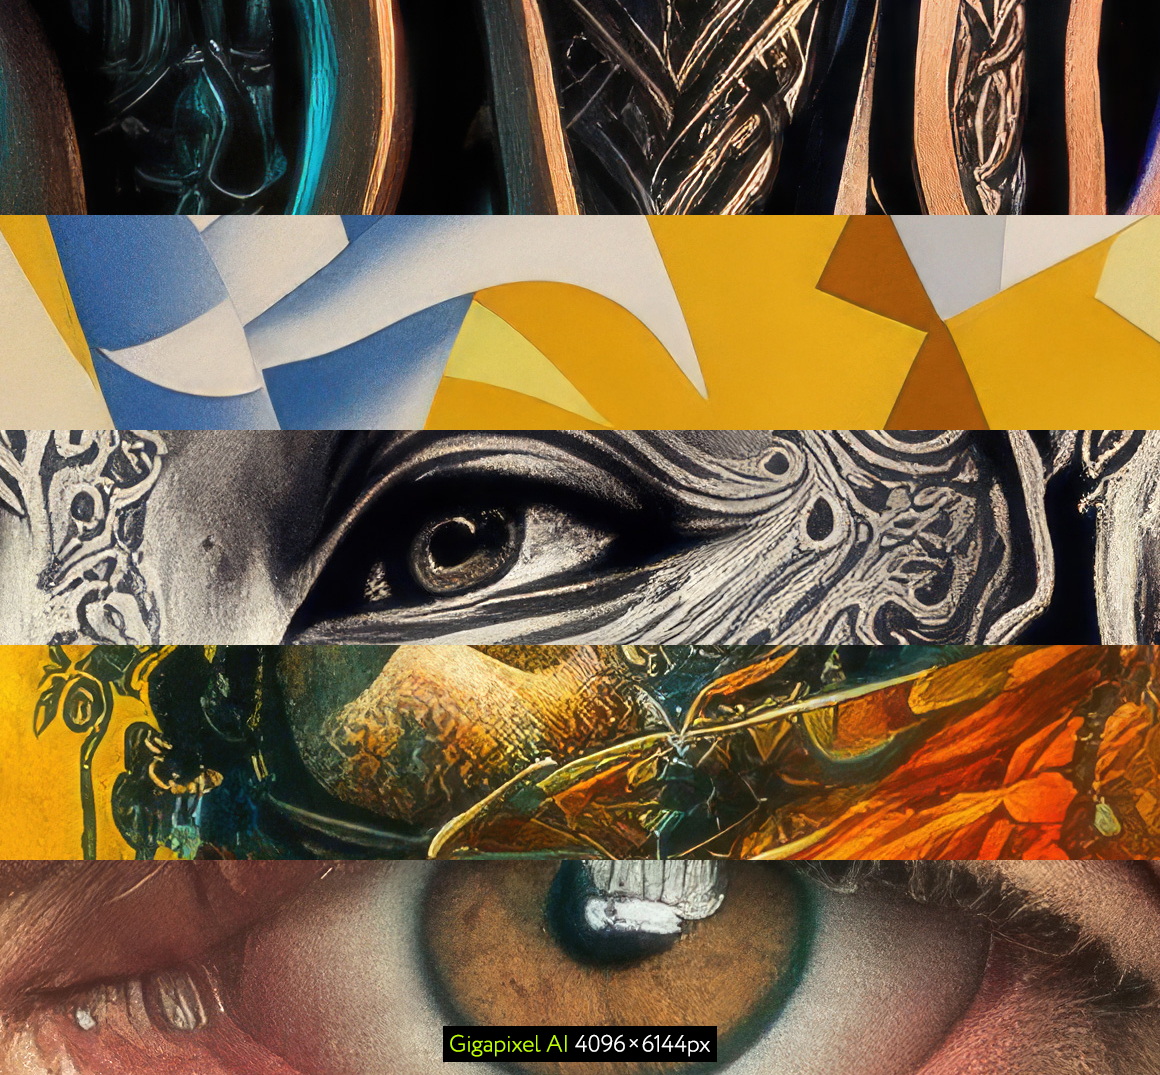
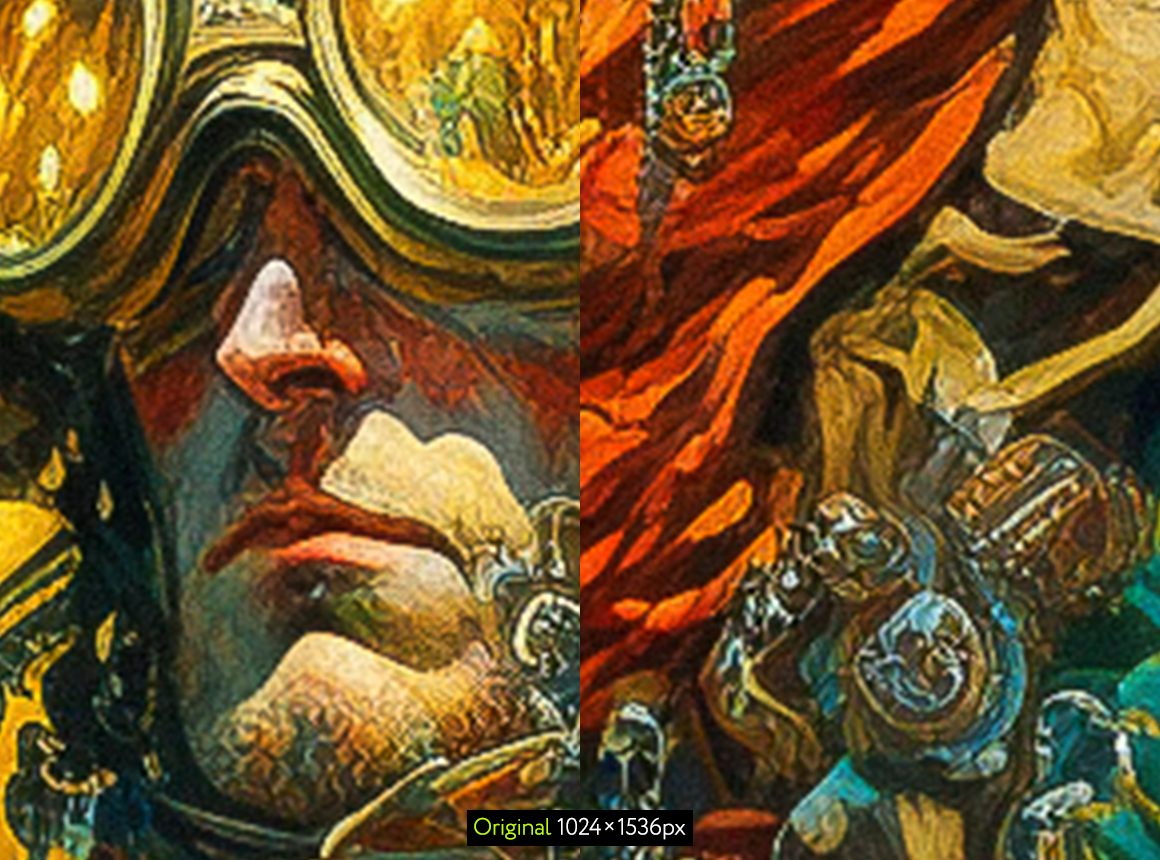
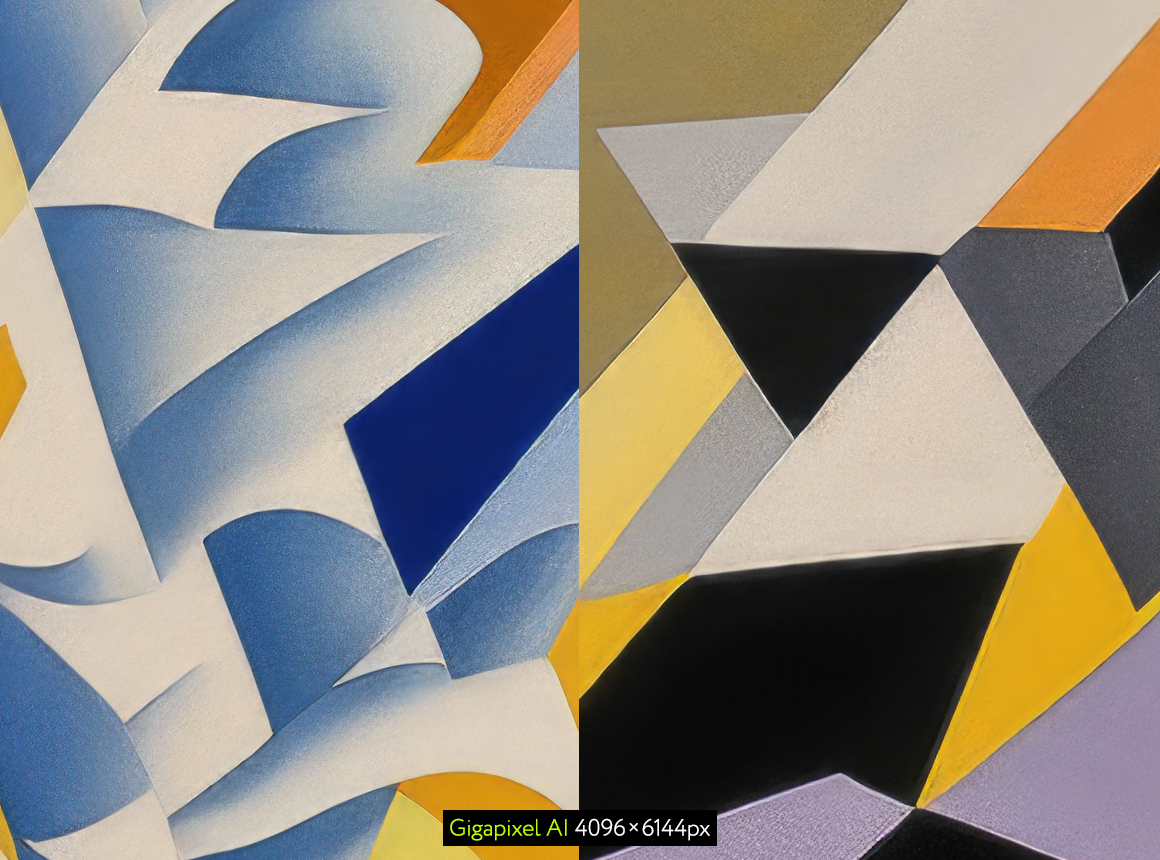
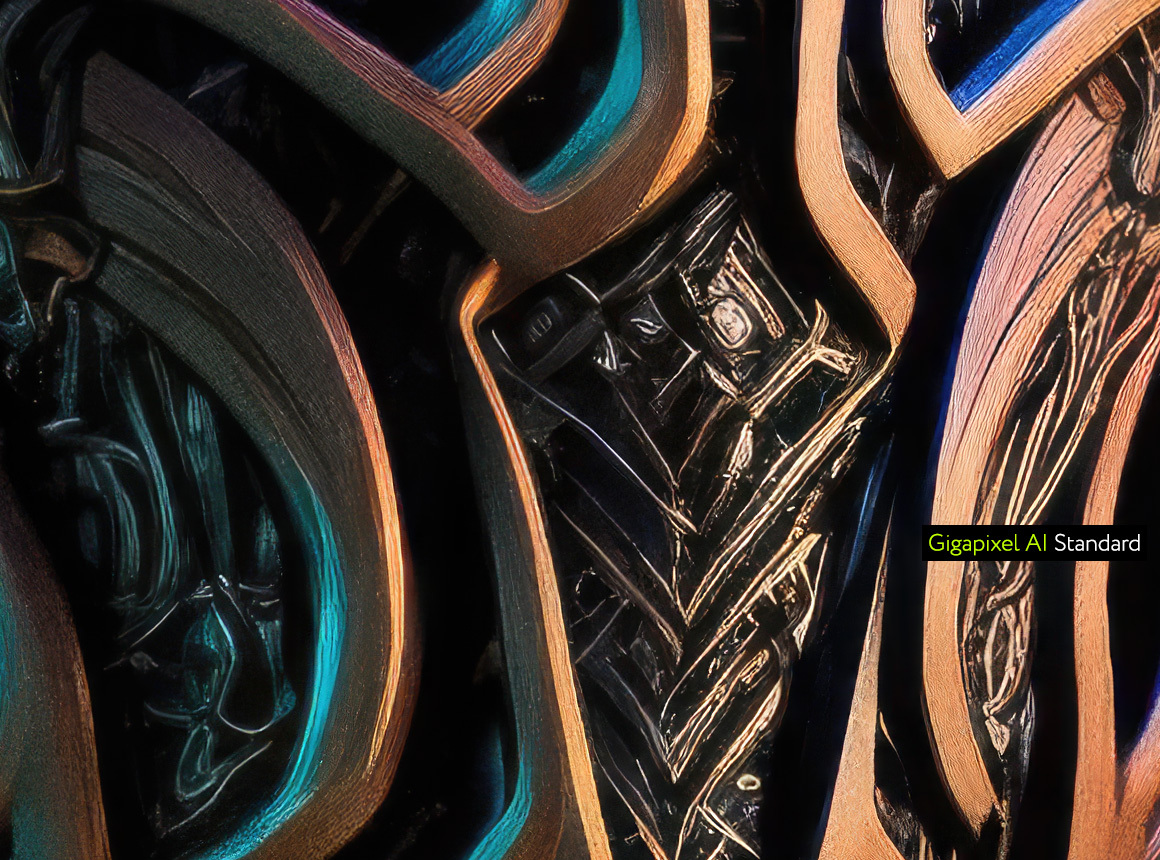
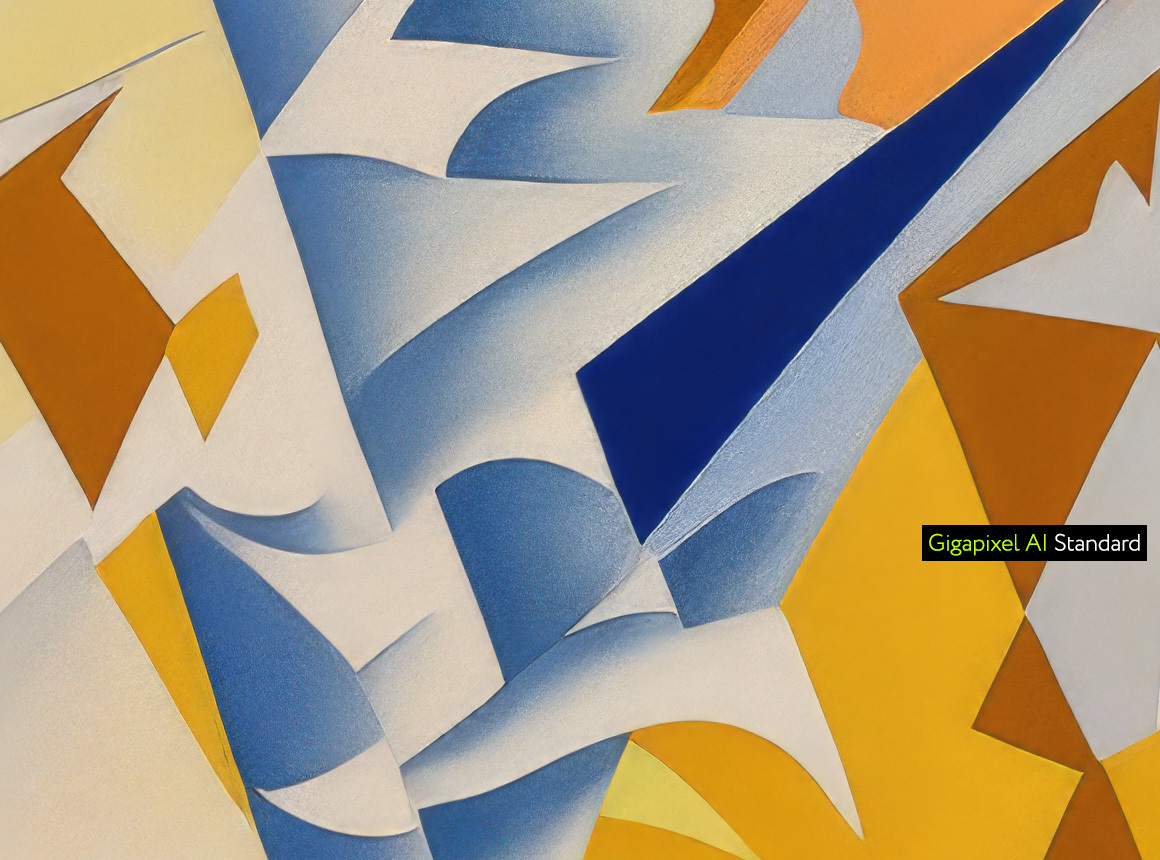
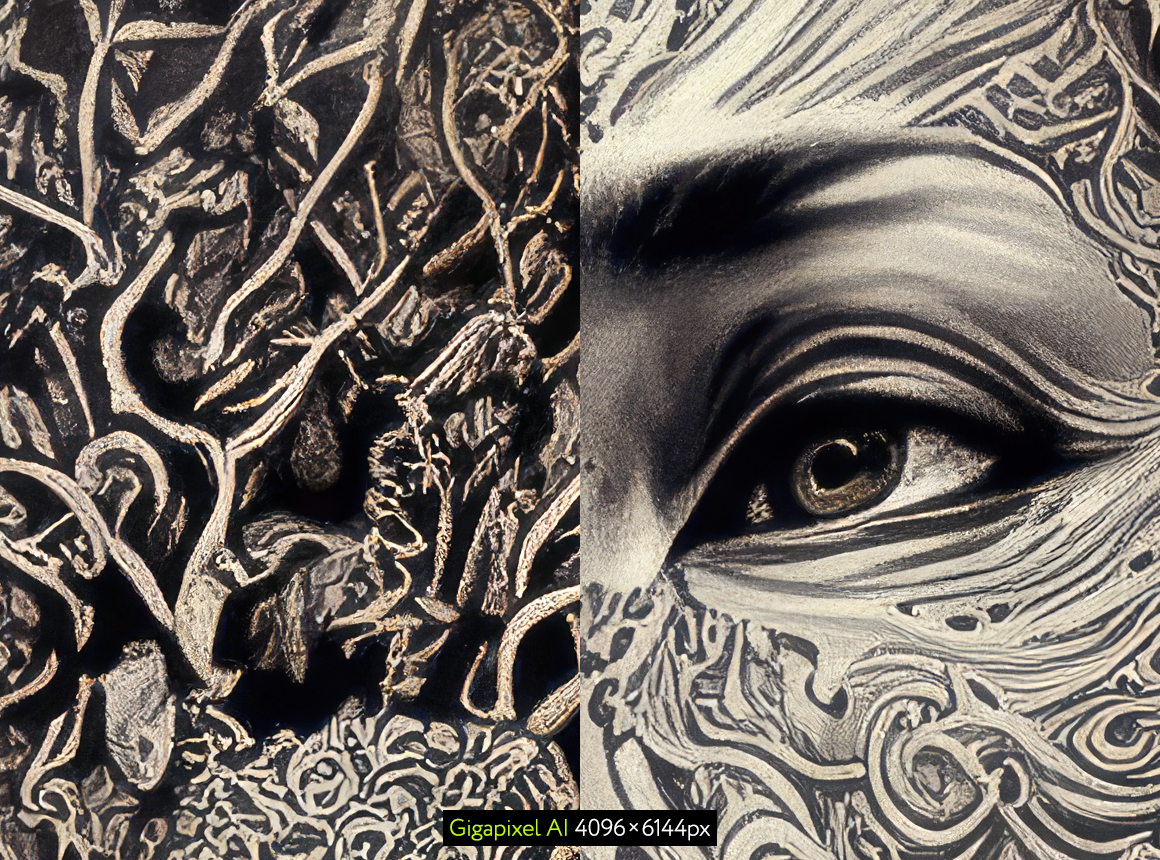
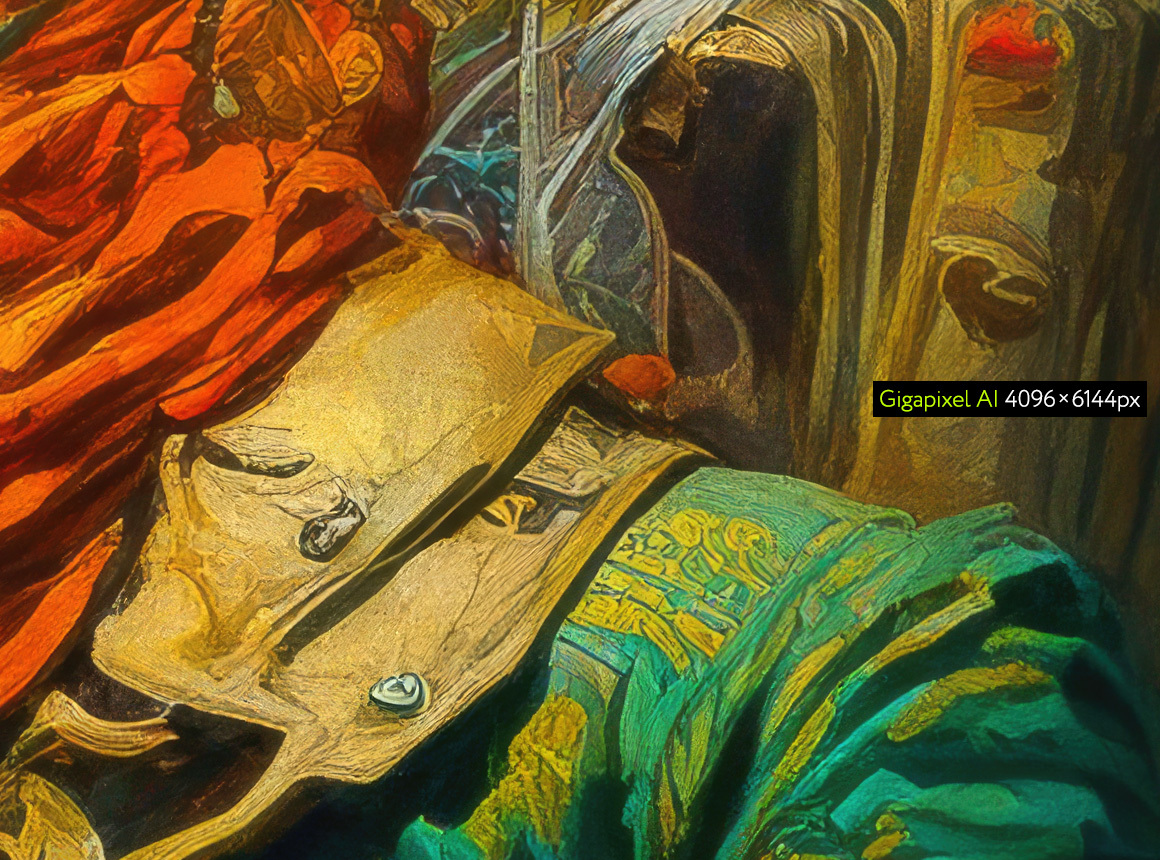
In this comparison, Gigapixel AI upscales are put against original images resized to have the same resolution. In all the following tests, I will be comparing the results from the upscaler in question to those of Gigapixel AI.

Gigapixel offers several built-in AI models (see specs below). However, I found the Standard mode the most useful, delivering the best results in each benchmark position. Here is a comparison of Lines vs Art & CG vs Standard models with Line Art test.
Capabilities
Speed: ~4 minutes (might be less depending on the model: e.g., Lines is faster, Standard takes longer).
PNG file size: at ~130Mb per image, Gigapixel AI is top of the list at this, too. However, with the use of a fantastic free tool ImageOptim↗︎ I could reduce the file size to 40Mb with 90% lossy optimization and to around 25Mb with 80%.
There are six models available at the moment (one was added while I was writing this!):
Standard: a universal AI upscaler model, also specifically recommended for photographic images.
Lines: an AI model trained specifically on architecture and objects.
Art & CG: trained on non-photographic images: computer graphics, fine art, drawings, etc.
HQ: isn't relevant to our research since it is created for high-resolution images from modern cameras.
Low Res: a model for images with blocky compression artifacts.
Very Compressed: automatically removes JPEG compression artifacts, applies noise reduction, and sharpens the output.
Very high-quality results. Beautiful for prints (see below).
Gigapixel AI is capable of upscaling to up to 6 times the original size—and you can set it to an even higher multiplier, but after that, “the quality is not guaranteed.”
User-friendly interface, easy to use.
Comes as a stand-alone app and Lightroom/Photoshop plugins (for both Mac and Windows).
Lightning-fast upscaling.
There is one year of free regular model updates. I.e., a free year of constant algorithm advancement and ever-improving results.
At 99,99$ price tag, it's an investment piece. However, the benefits and feature set make it totally worth it.
Verdict
After trying alternatives, my choice was clear: I was ready to pay for a clean design, intuitive user experience, almost no waiting time, and overall convenience.
Gigapixel AI didn't make me think. I don't want to lose time and energy struggling with tons of settings, lines of code, and unexpected errors. I want piece of software to just do its job in the most efficient and straightforward way, while giving me some controls (if needed), and Gigapixel AI shines at exactly this.
Most importantly, the quality of upscales is just outstanding. And it's a one-time investment!
2. Adobe Photoshop Super Zoom
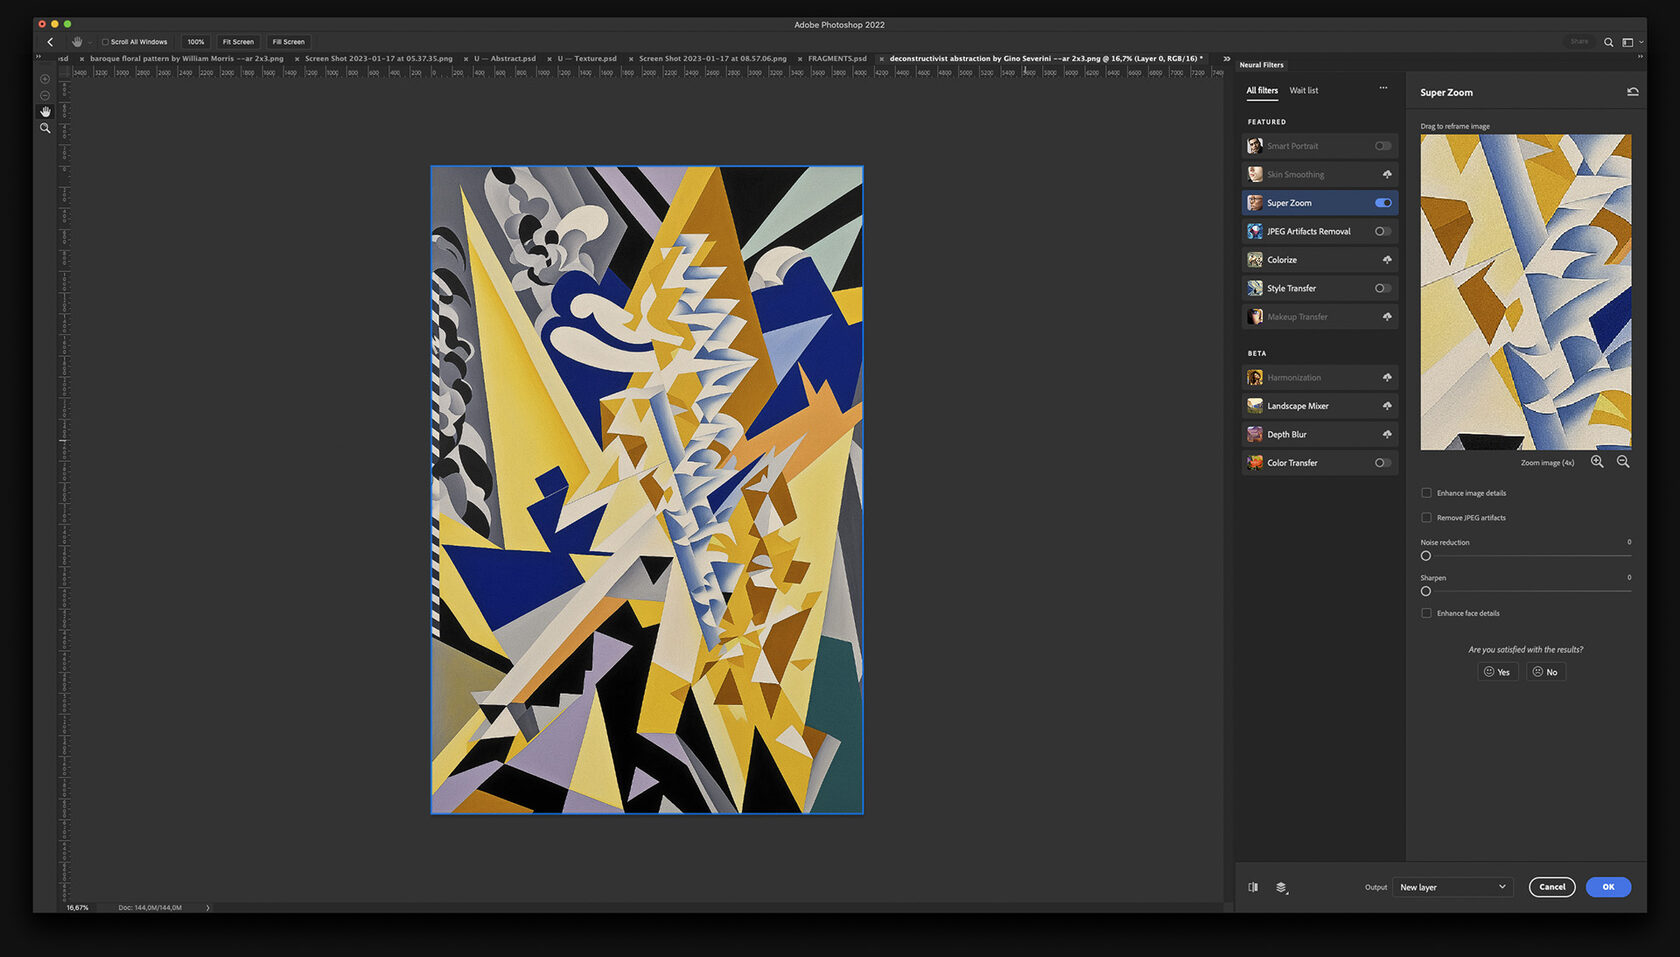
Super Zoom is a neural filter in Adobe Photoshop that uses artificial intelligence to—as its name suggests—increase the resolution of an image. The feature uses deep learning to analyze the details of an image and generate new pixels for smooth upscaling.
SuperZoom has an additional option called Enhance face details. Let's check what it does: we have a benchmark exactly for that.
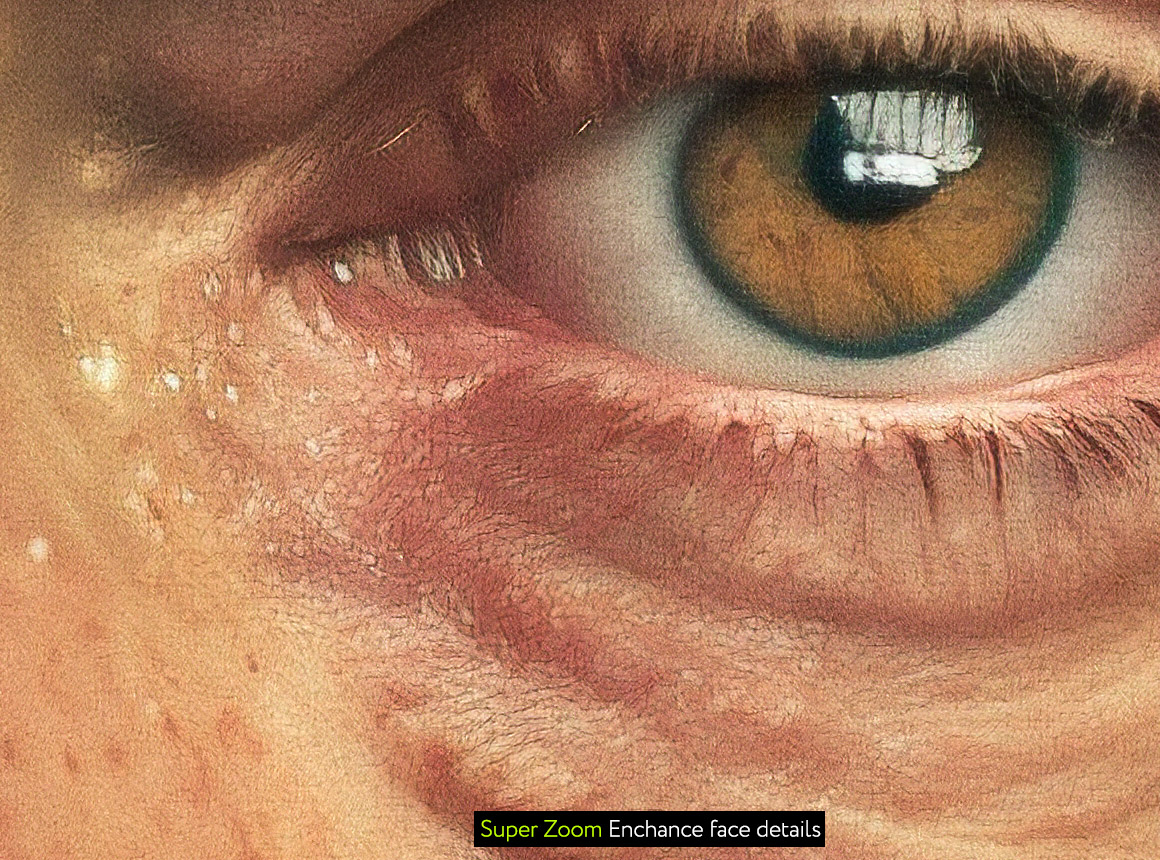
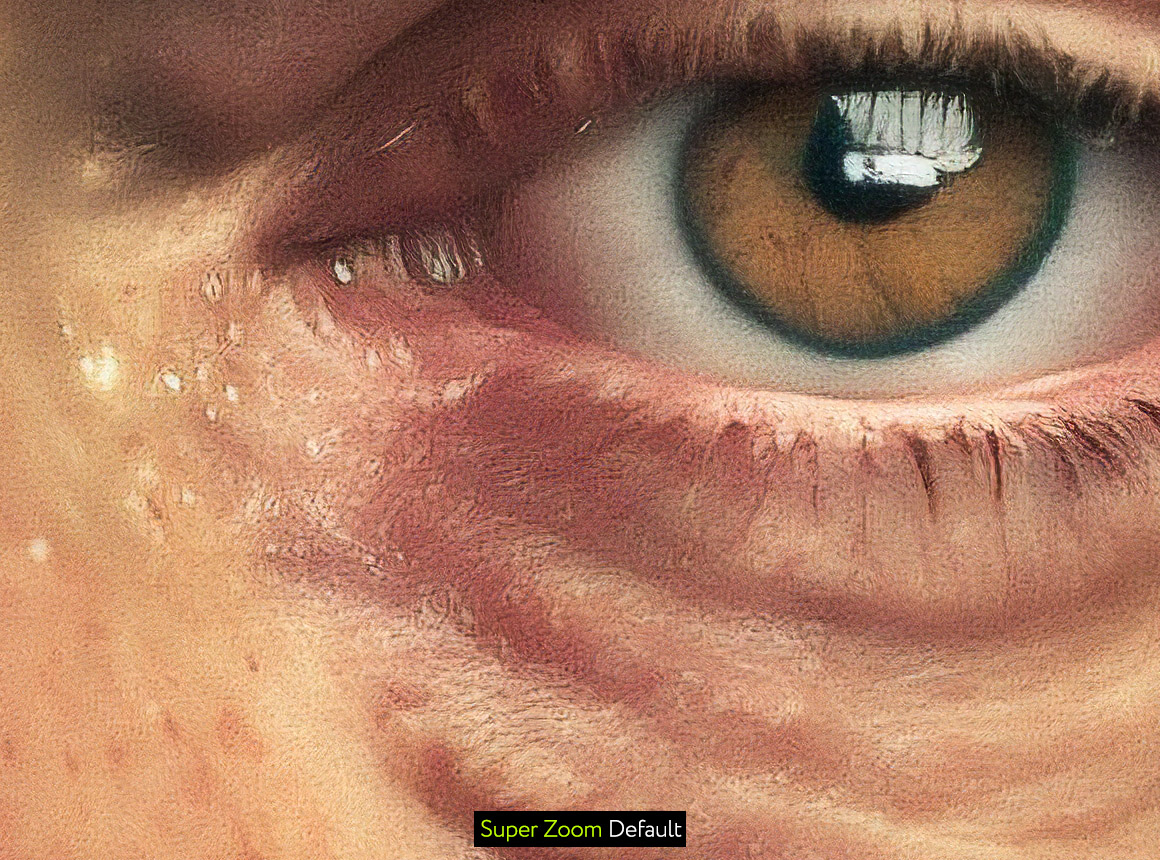
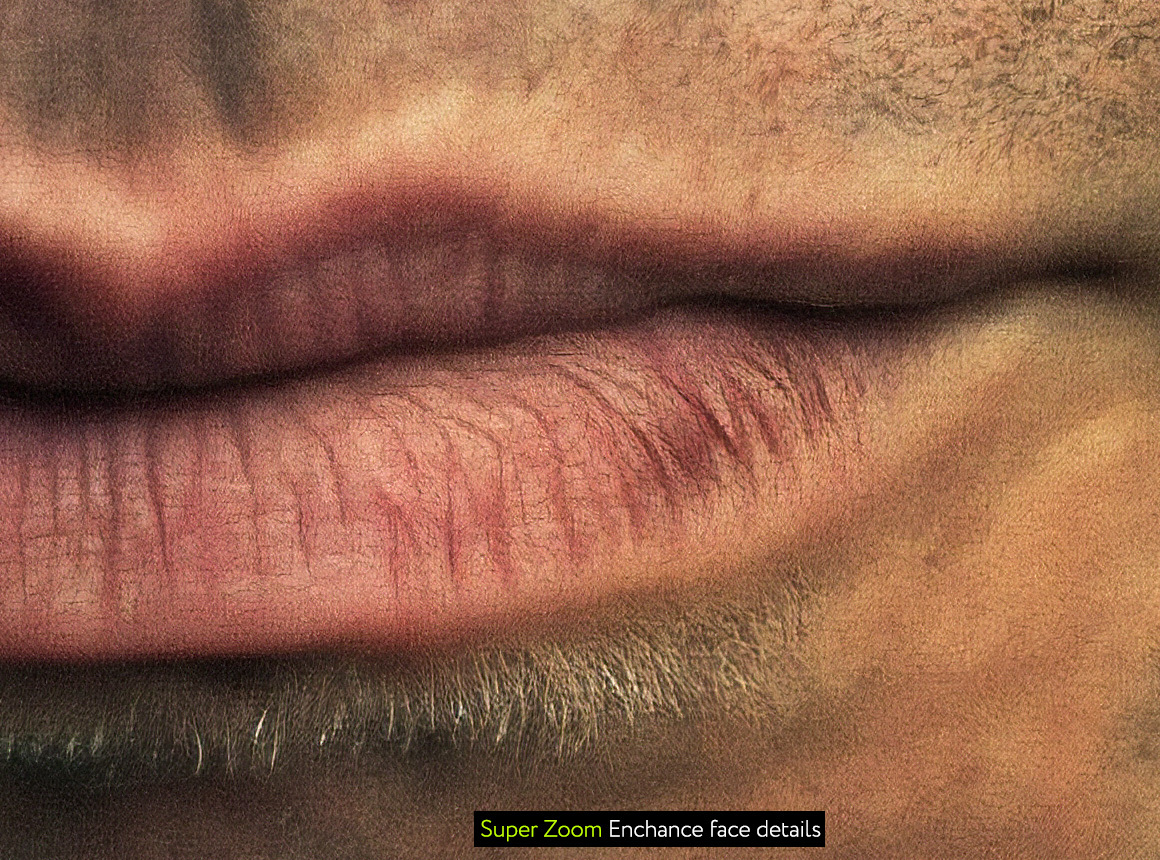
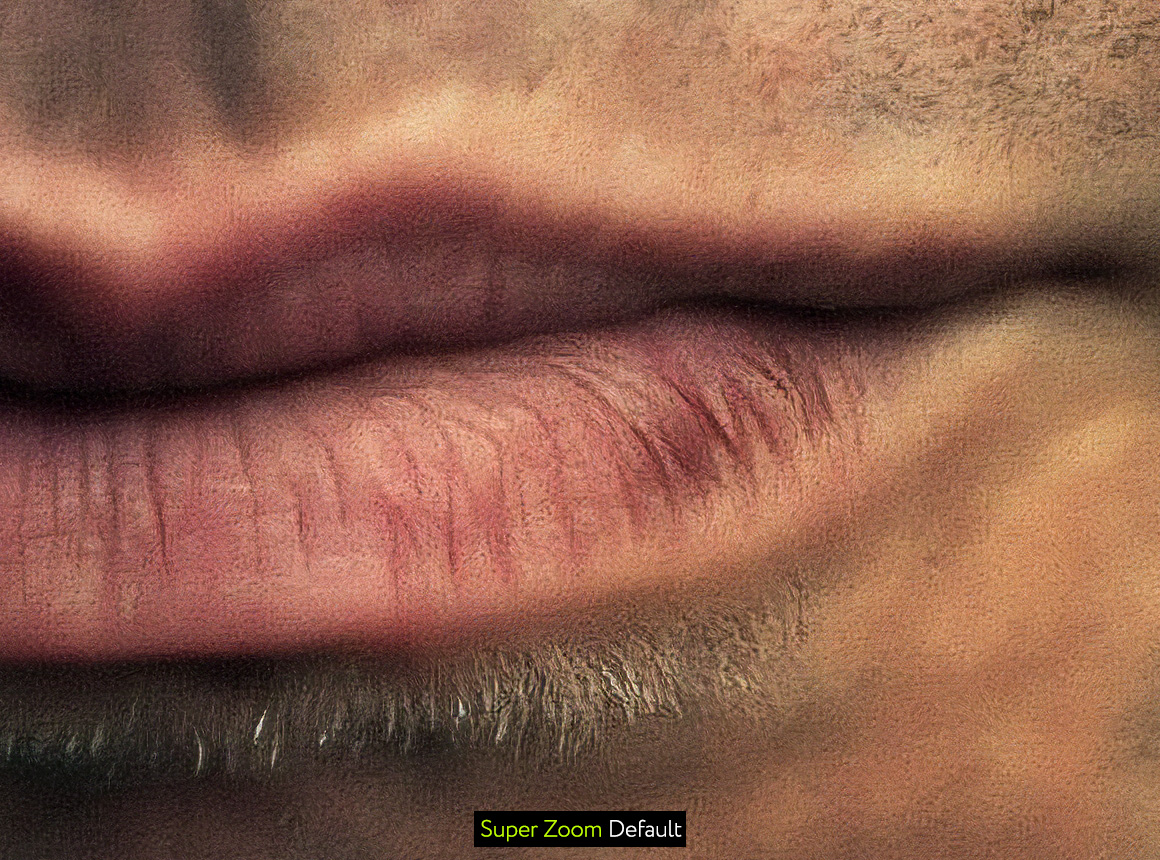
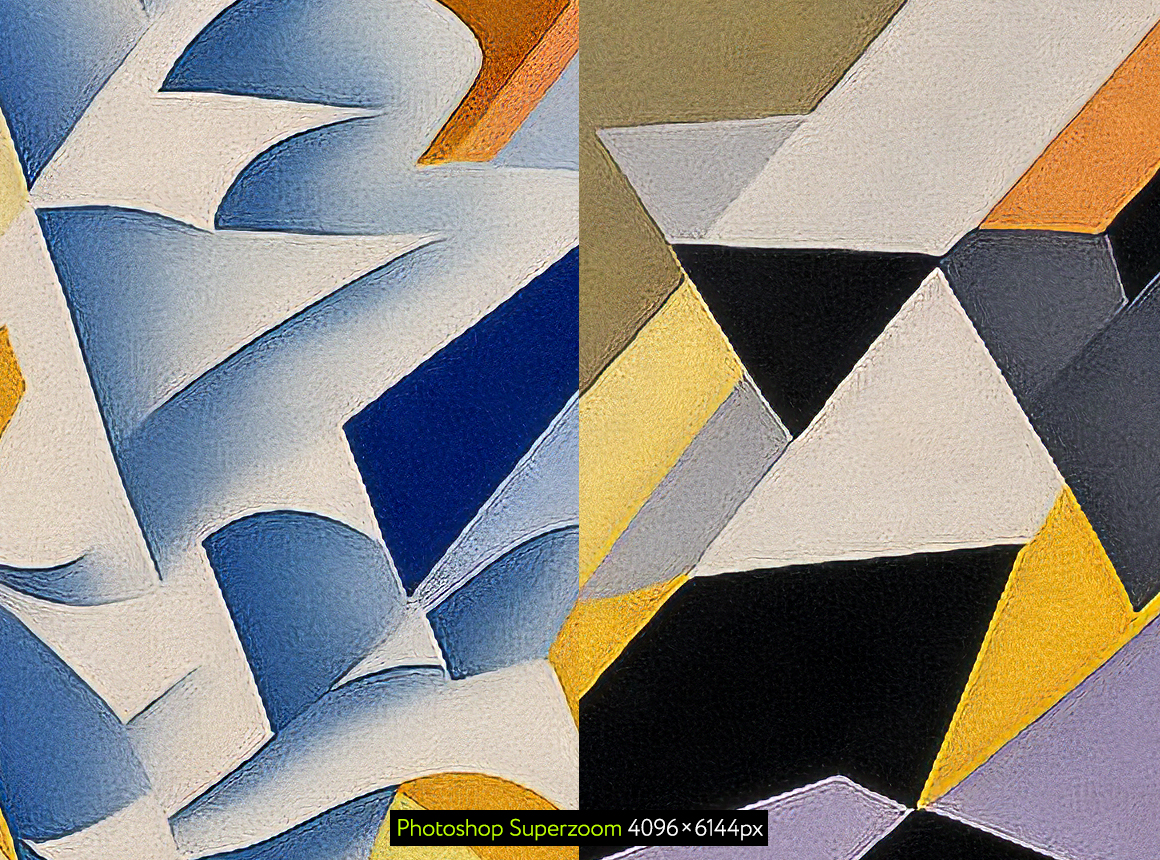
A decent enhancement, especially in the hair! Let's see how Super Zoom with Face enhancement compares to Gigapixel AI with Standard model.
Capabilities
PNG file size: saved with Photoshop's Medium Size PNG settings Superzoom produces 80–85Mb per image.
Speed: ~40 seconds—1 minute per upscale..
Additional options for Enhancing image details and Enhancing face details, but the model is the same for all images.
Works well for photo-realistic images, especially for close-up portraits due to its Enhance face features function.
The interface is pretty straightforward. However, not everything is intuitively clear.
It's fast!
It's integrated into Adobe Photoshop, so if you already have a subscription that includes PS, it comes as a bundle. And not just the Super Zoom, but other neural filters, too.
Adobe is constantly updating its flagship software, so there are high hopes that Super Zoom will be improving with time.
The overall quality is definitely not the highest on the list.
It runs locally and is quite demanding of resources, so you need a powerful computer to run Superzoom effectively.
It went on glitching on numerous occasions (especially with larger original images), rendering unknown errors and refusing to work.
Verdict
There is a trick to making a low-resolution image appear better. You need to first upscale it—and even a medium-quality upscaler will do—and then downscale it back to its original size. For this and many other situations when you don't intend to print your upscale or won't need a high-resolution file with fine details—Photoshop Super Zoom is a good choice. Especially, if you are already a user of Adobe infrastructure.
3. SuperRes Diffusion Colab
Google Colab is a free online platform that allows users to write and run code in a web browser. It also provides access to powerful computing resources, such as GPUs, for running complex machine-learning models. Numerous colabs can upscale images (and not only that).
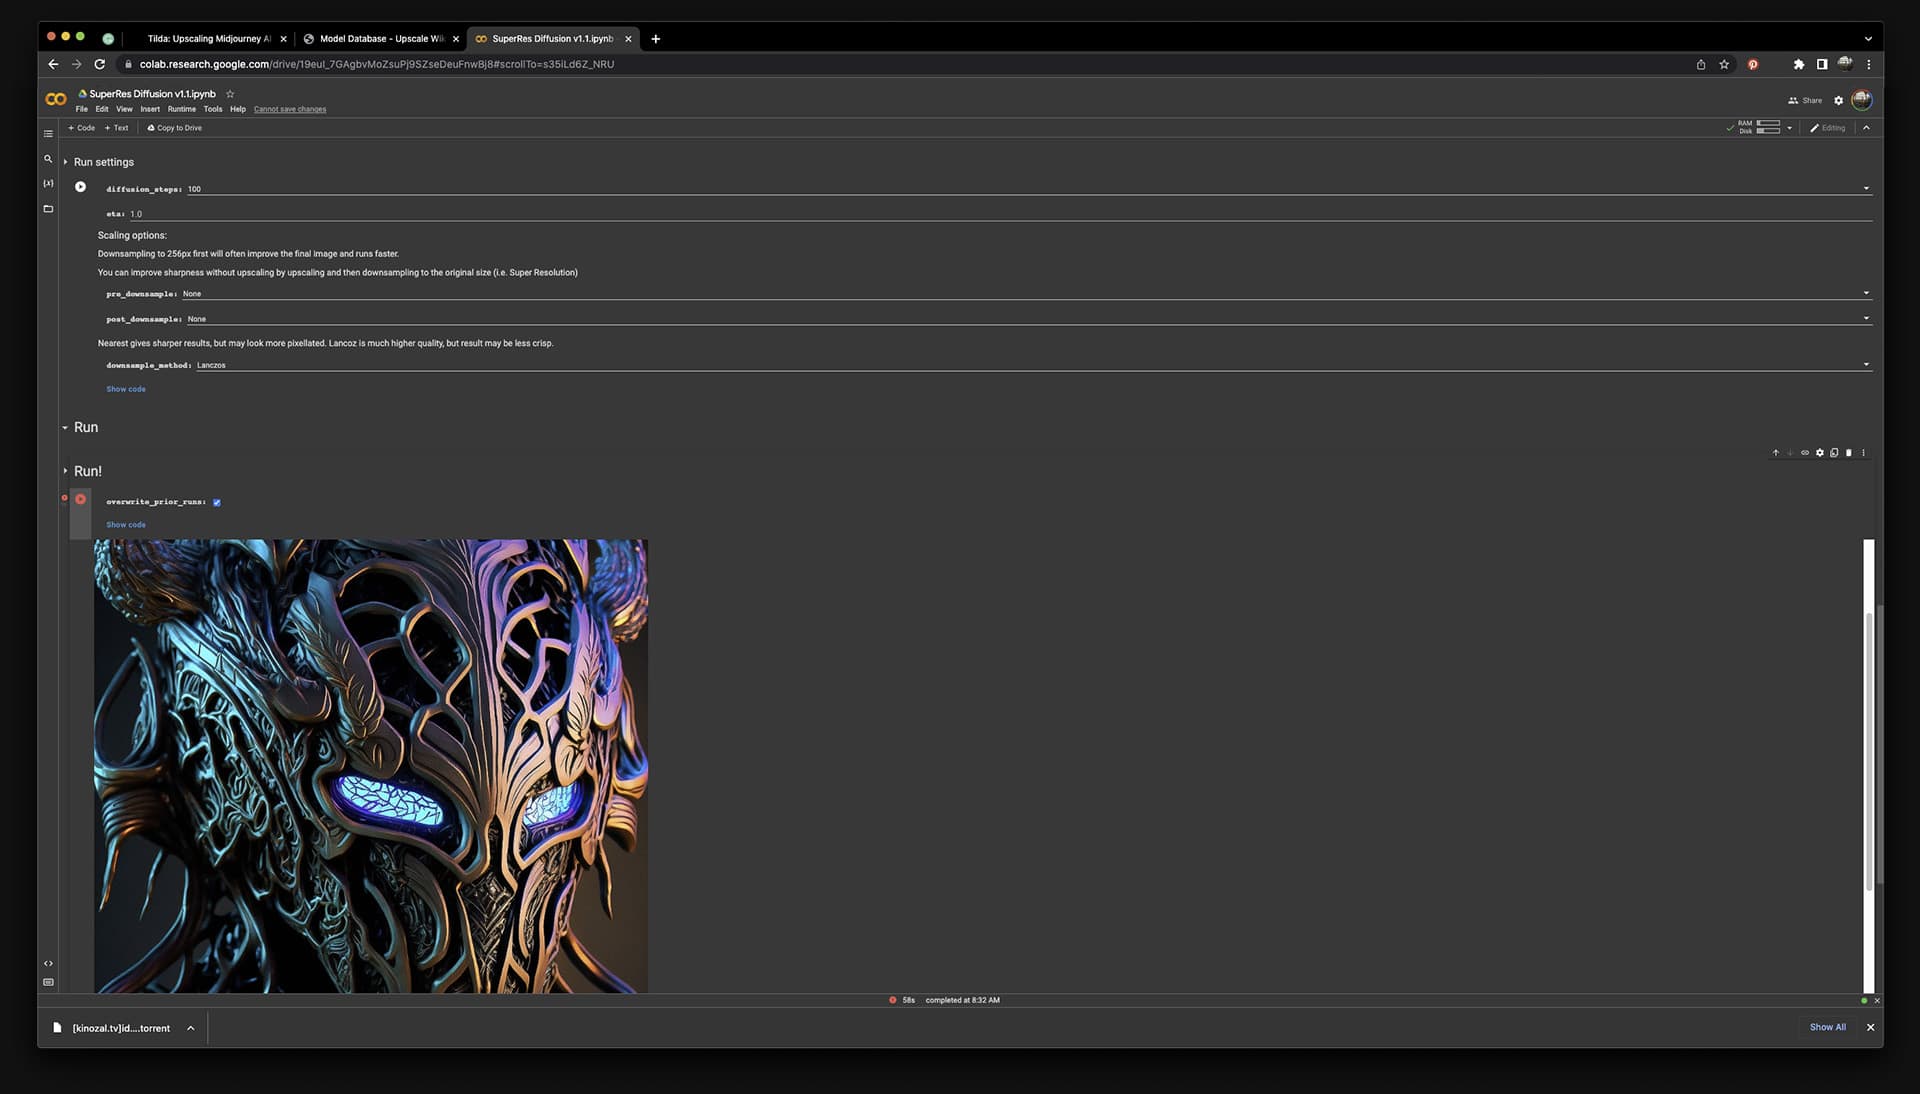
For this test, I chose SuperRes Diffusion—batch upscaling and super-resolution colab based on Latent-Diffusion. If you decide to try it yourself, I recommend this short and comprehensive article on how to use it.
Capabilities
Speed: ~20-40 minutes per upscale.
PNG file size: ~50Mb per image.
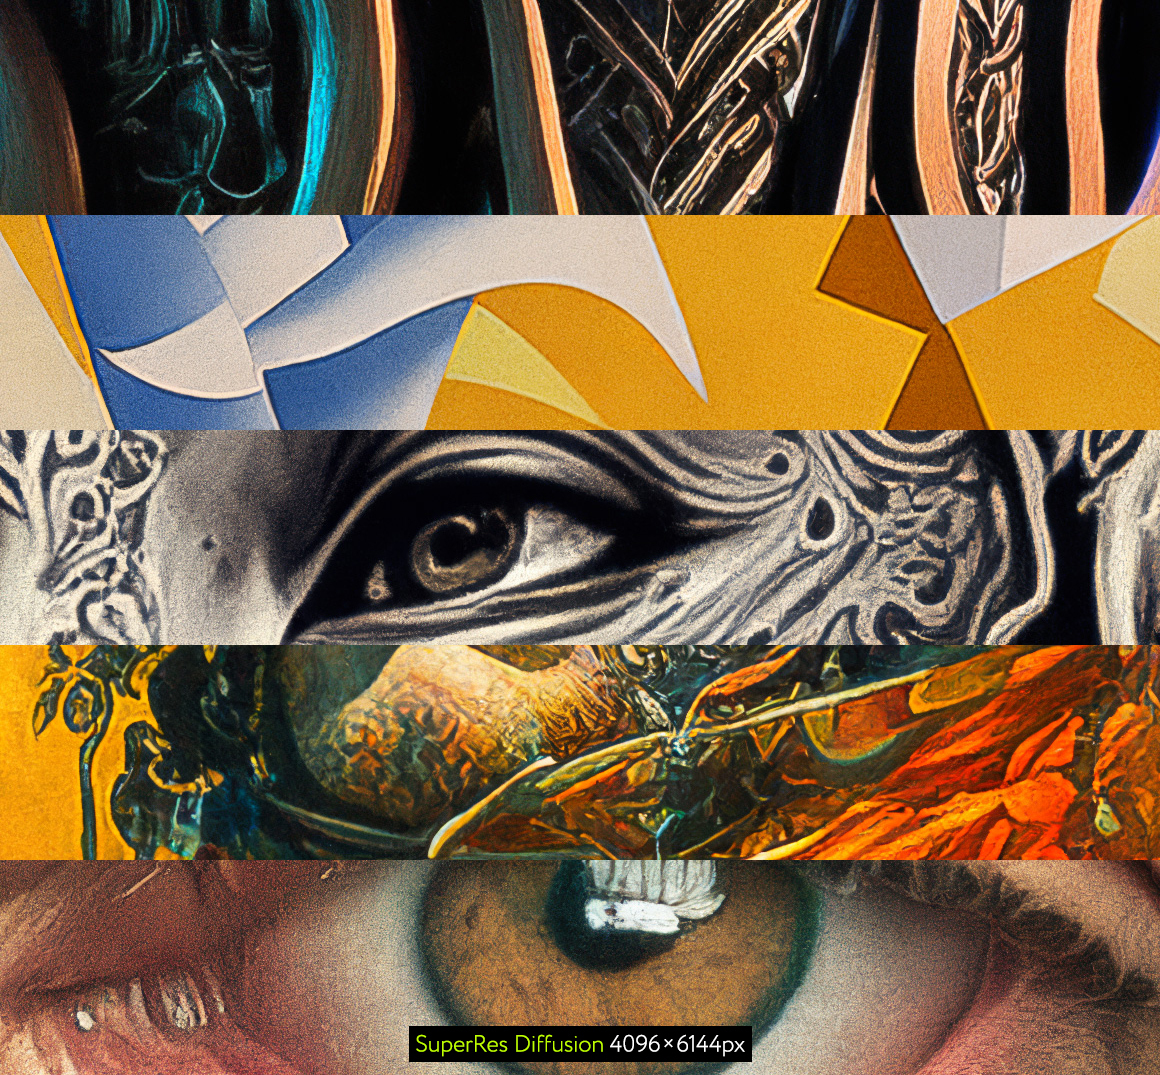
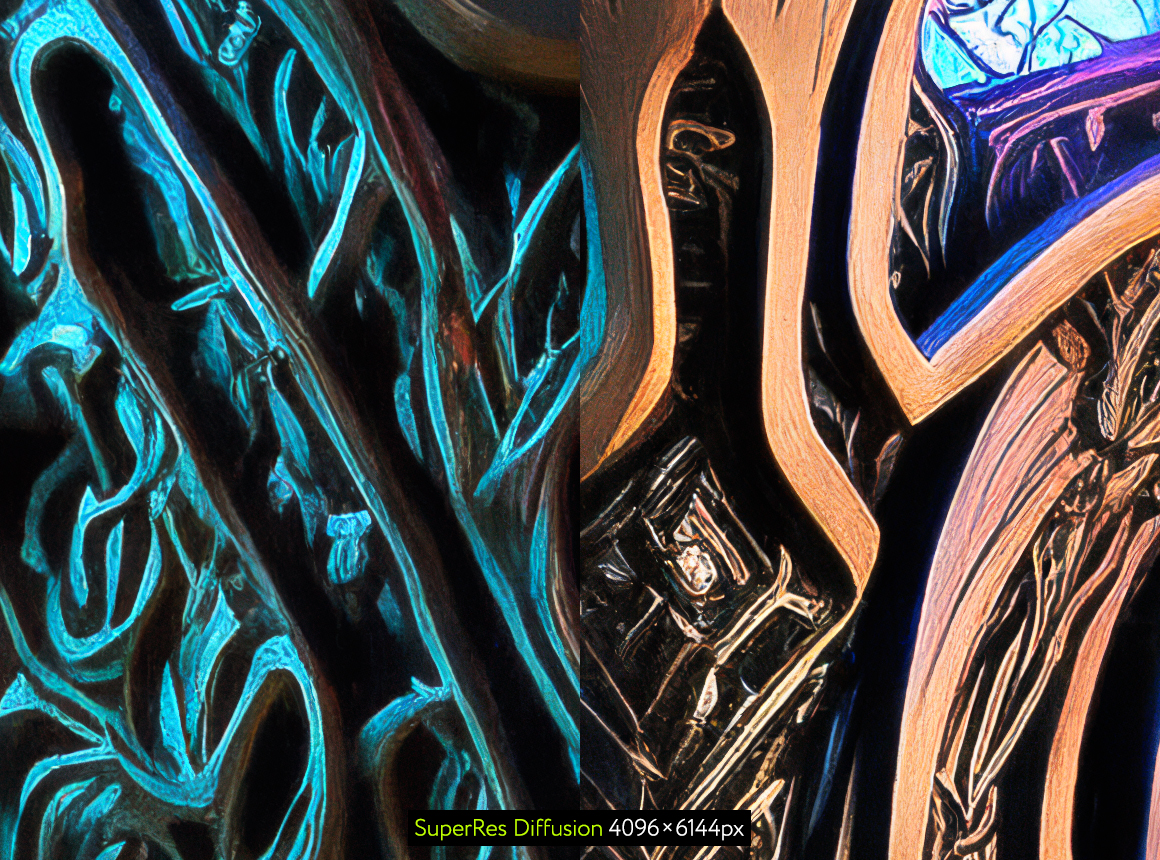
SuperRes is an extension for Latent Diffusion↗︎—“High-Resolution Image Synthesis with Latent Diffusion Models.”
SuperRes Diffusion colab managed to deliver satisfactory results, especially with the more photographic images.
Despite some tech-savviness, setting up the SuperRes Diffusion colab was a bit of a struggle, and using it was overall a confusing experience. I encountered numerous glitches along the way. It stopped in the middle of a script's execution or showed errors, after some of which I had to restart the whole thing.
To run SuperRes or similar colabs, you must be a Google Drive user AND grant a colab—someone else's program—access to your Drive's entire content: with modification rights. I am a trusting (or just reckless ;)) person, but for many, this can be a privacy concern.
The free version is slow. At the default quality (100 samples), it took from 40 to 60 minutes per image.
And your free server time is finite.
Verdict
I'll be honest, the colab world is very new to me, and my first user experience with it wasn't smooth. Even though using SuperRes turned out to be easier than it seemed at the beginning, the environment doesn't make a non-software engineer feel comfortable. And occasional errors that explain nothing (e.g., "Cannot read properties of undefined (reading 'next'") don't help, too.
Then there is also a GPU time limit for free users that is difficult to control and runs out too fast.
What bothered me the most, however, were the privacy concerns. Full access to my whole Google Drive, seriously?
In the end, I am sure colabs are powerful and versatile tools for those advanced enough to be able to use them. But in the case of SuperRes Diffusion, its speed and quality of its results couldn't outweigh its disadvantages.
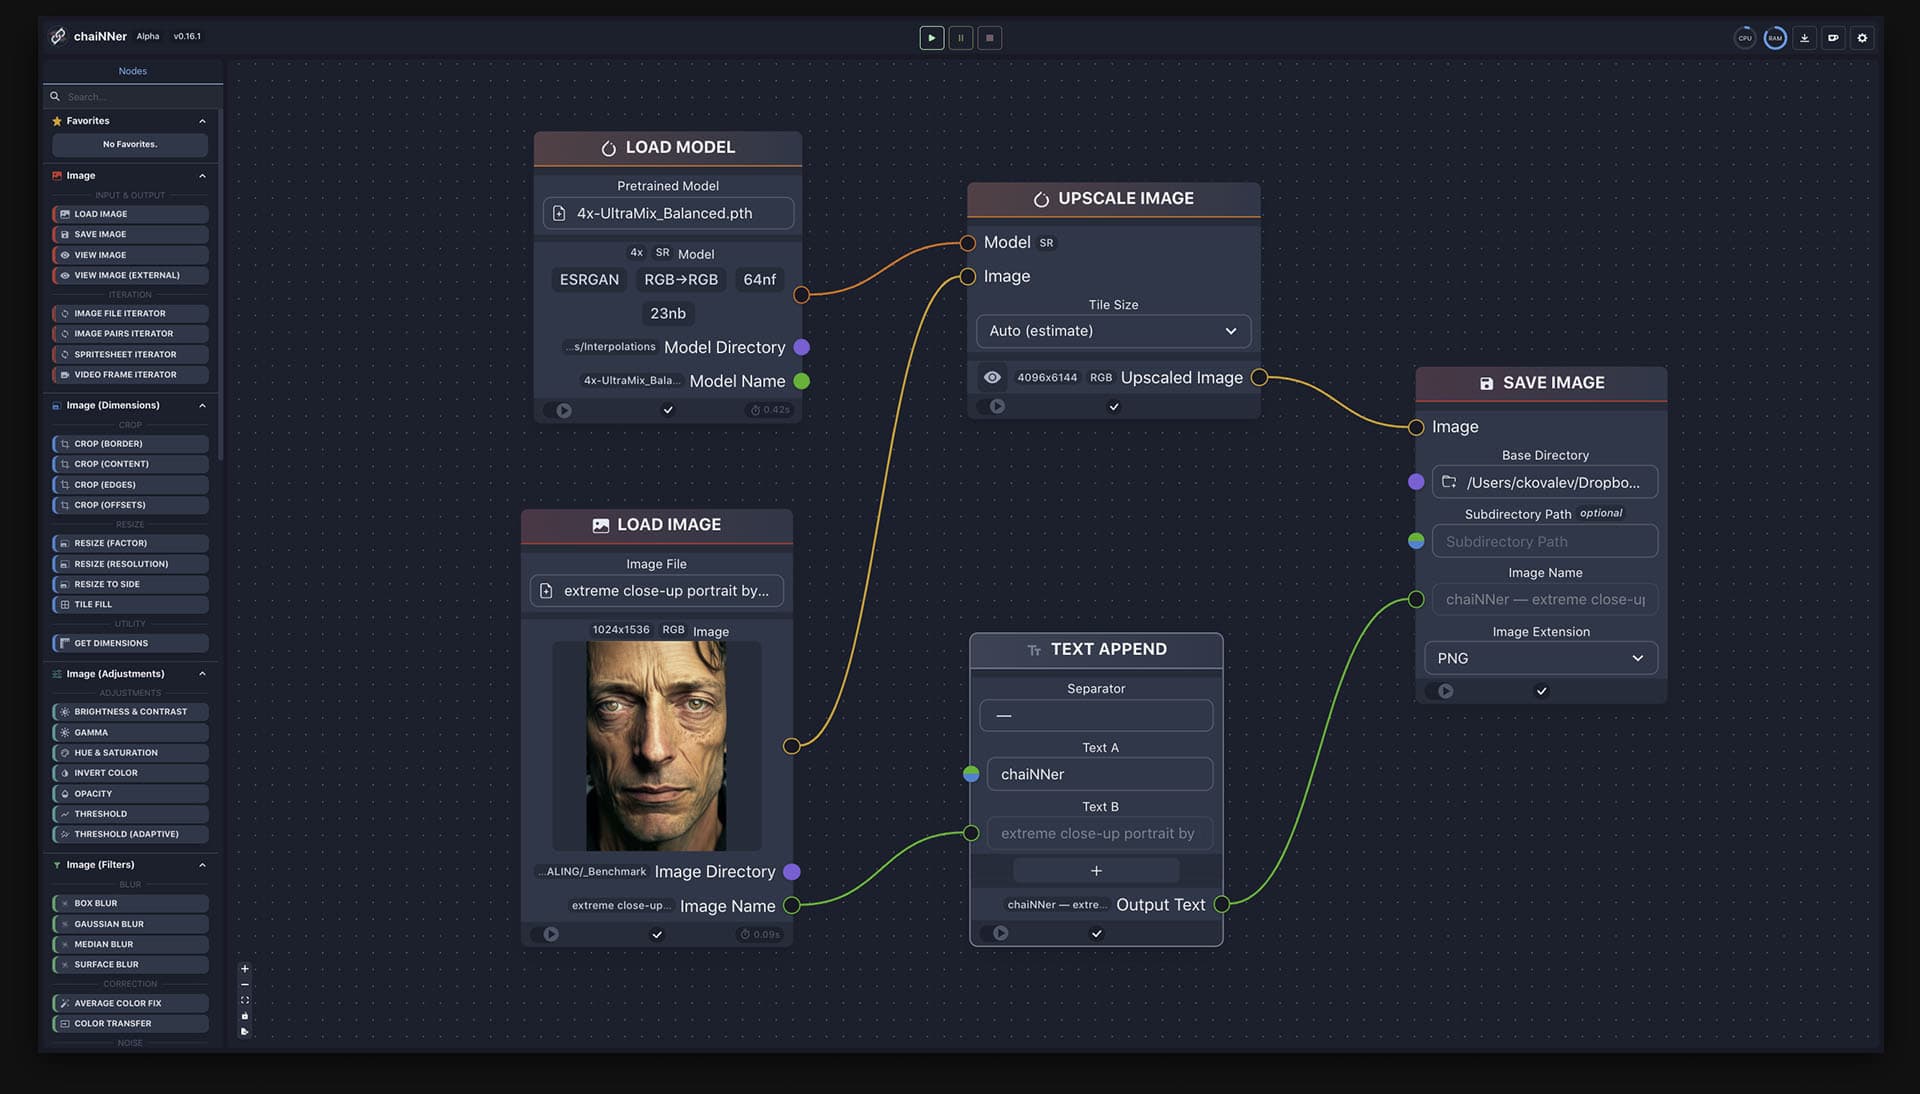
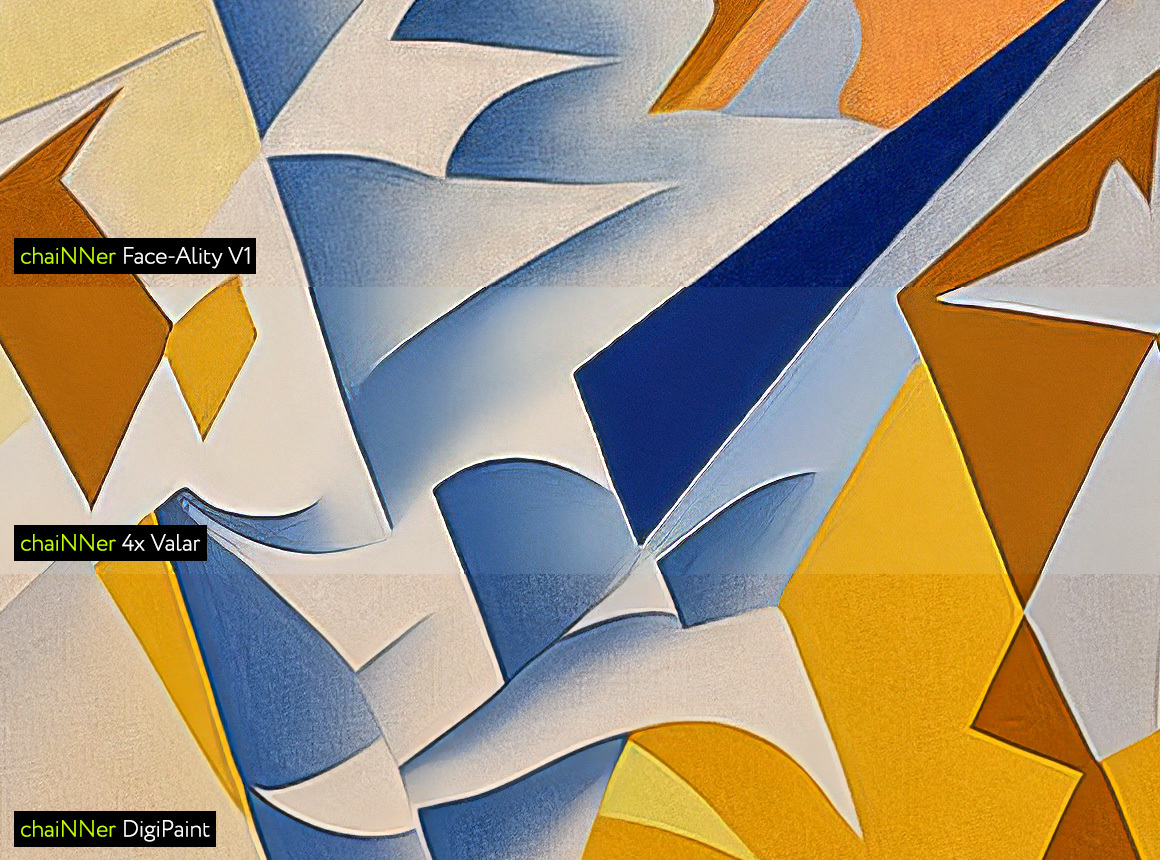
4. chaiNNer
chaiNNer is “a flowchart/node-based image processing GUI aimed at making chaining image processing tasks (especially upscaling done by neural networks) easy, intuitive, and customizable.”
It is easy and intuitive—after a particular learning curve. ;)
chaiNNer is a powerful tool to do so many things that upscaling becomes a fraction of its functionality. It is a spaceship! This is fantastic if you're into space traveling but overwhelming when you need a drive to a local supermarket. 8)
After downloading and installing chaiNNer, you will need to also download and set up the libraries you want to use. Upscale.wiki offers a massive list! There are hundreds of them: from universal-purposed models to very specifically-targeted ones (VHS restoration, Super Mario textures upscaling, models trained on coins, or cats, etc.). They have descriptions, but not all have examples of their outcomes. So you might have to choose from a few dozen of seemingly similar entries.
chaiNNer's interface is nicely designed, but it might scare an unprepared beginner. Especially if this is your first time working with node-based software. The principle, however, is pretty simple. There is a canvas where you arrange cards that represent inputs (like your image), actions (like applying an upscaler model), and outputs (like saving the result). By setting/dragging links between those cards, you define the workflow.
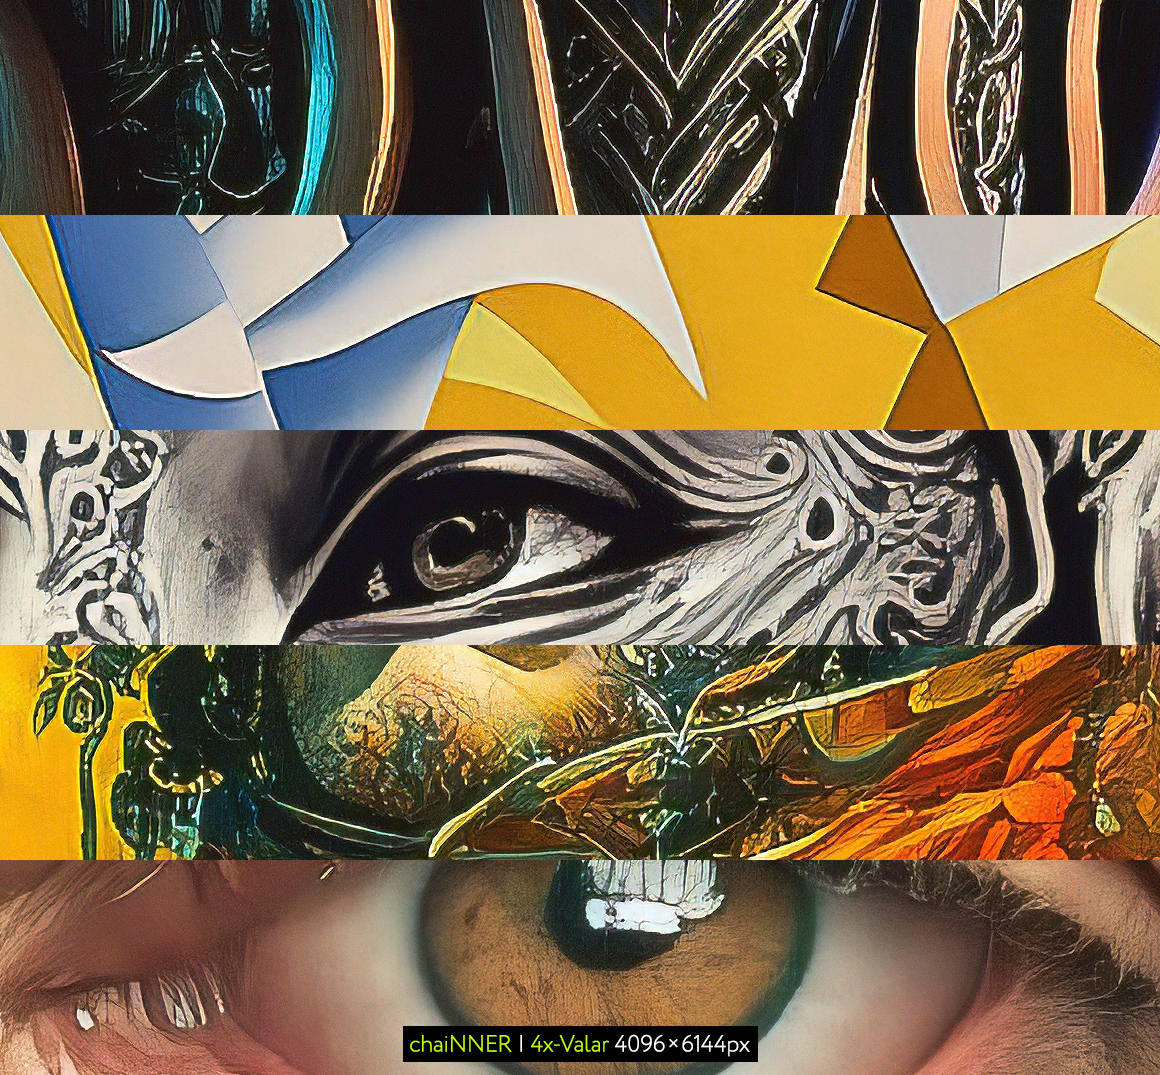
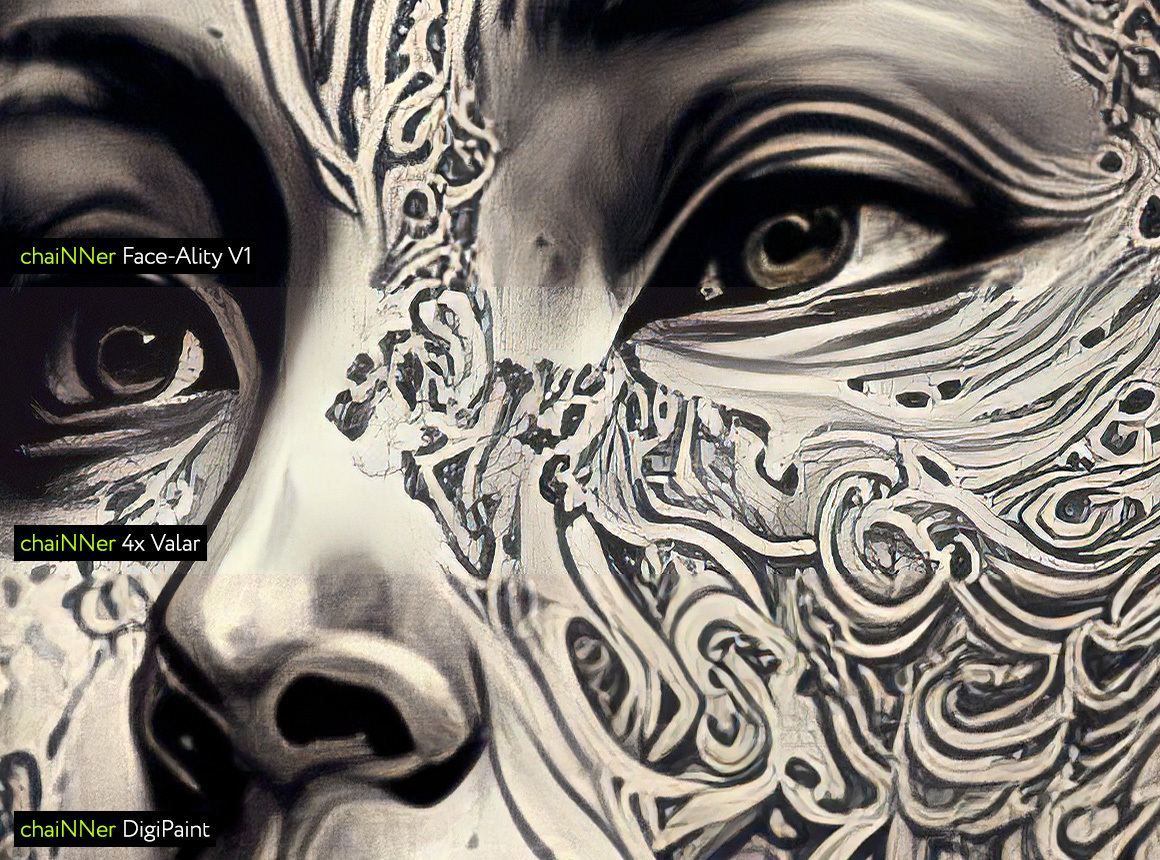
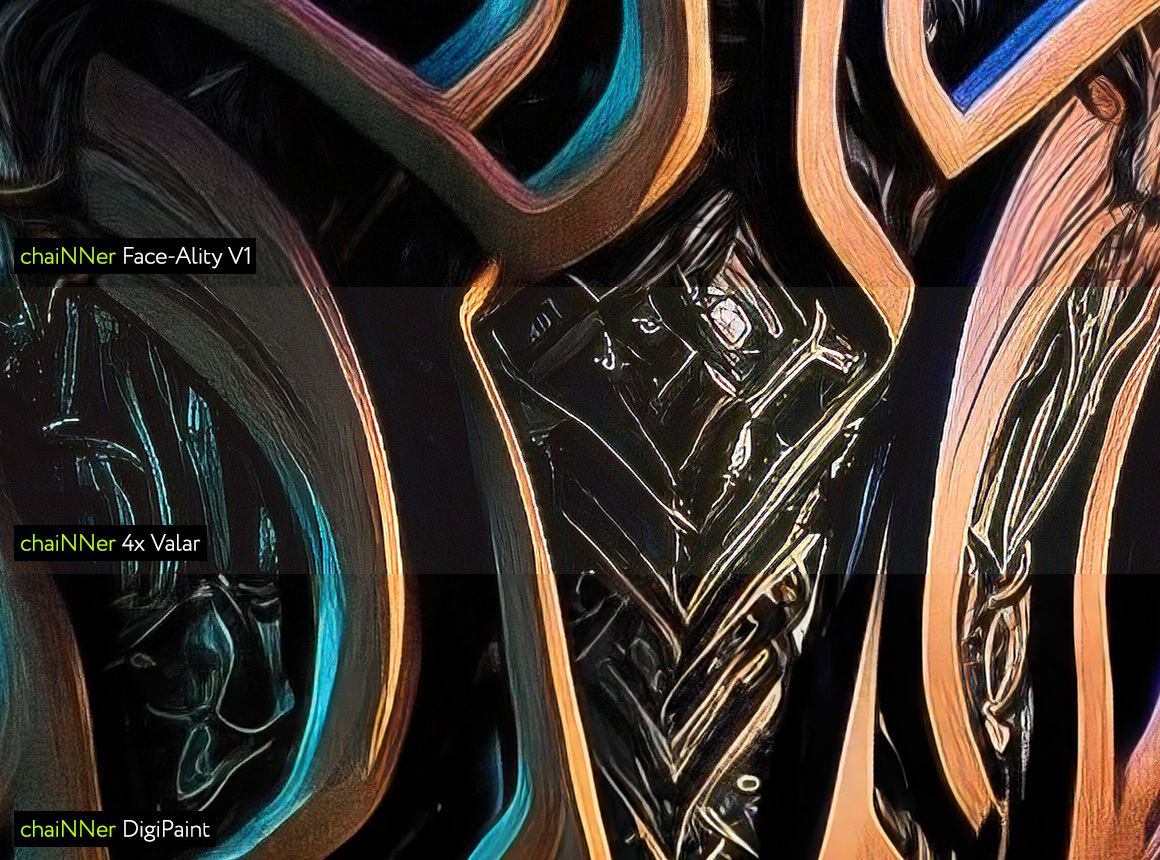
With chaiNNer I ran all tests using three different models: 4x Valar (for realistic photos), Face-Ality V1 (trained on faces), and Digipaint (an upscaler for digital art).
Capabilities
Speed: ~30-40 minutes.
PNG file size: ~50Mb per image.
There are many models available for chaiNNer. The best place to start is Upscale.wiki database↗︎
LOTS of features and possibilities, not just for upscaling.
LOTS of models you can use.
Decent results. And I am confident you can achieve more by playing around with various models and settings.
There is a learning curve to start with chaiNNer. Its interface is well-designed and pleasant to use, but the whole thing might be overwhelming for an unprepared user.
chaiNNer runs on your computer, utilizing its resources. If your machine is not advanced enough, that might result in waiting hours for even one upscale.
Verdict
chaiNNer is a powerful tool with features going way beyond simple upscaling. And open databases of free AI models are its infinite fuel source. With some learning and practicing, chaiNNer might become an impactful addition to your toolbox.
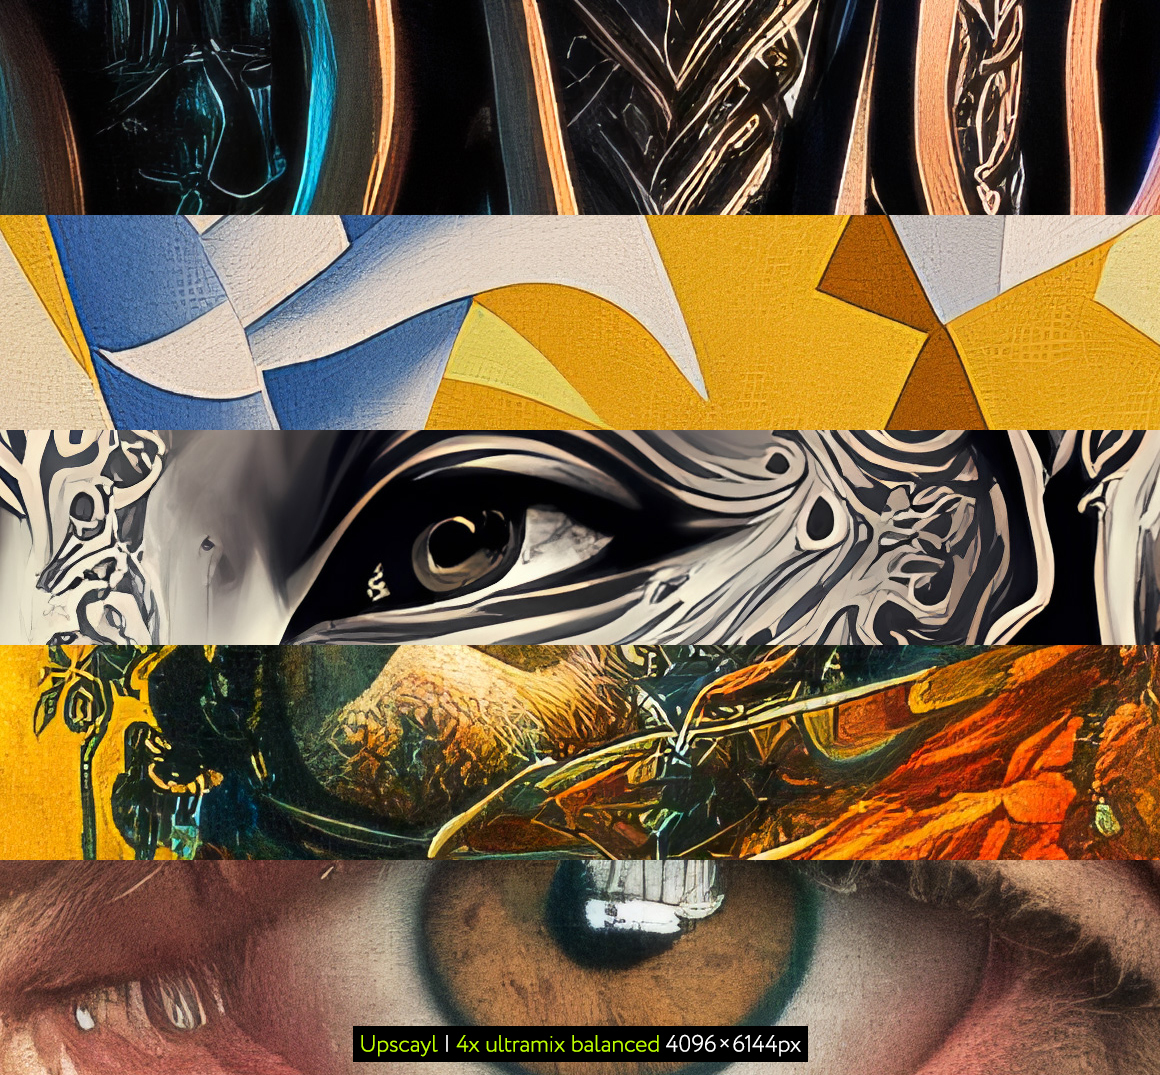
5. Upscayl
Upscayl is a free, open-source desktop application that works on macOS, Windows, and Linux.
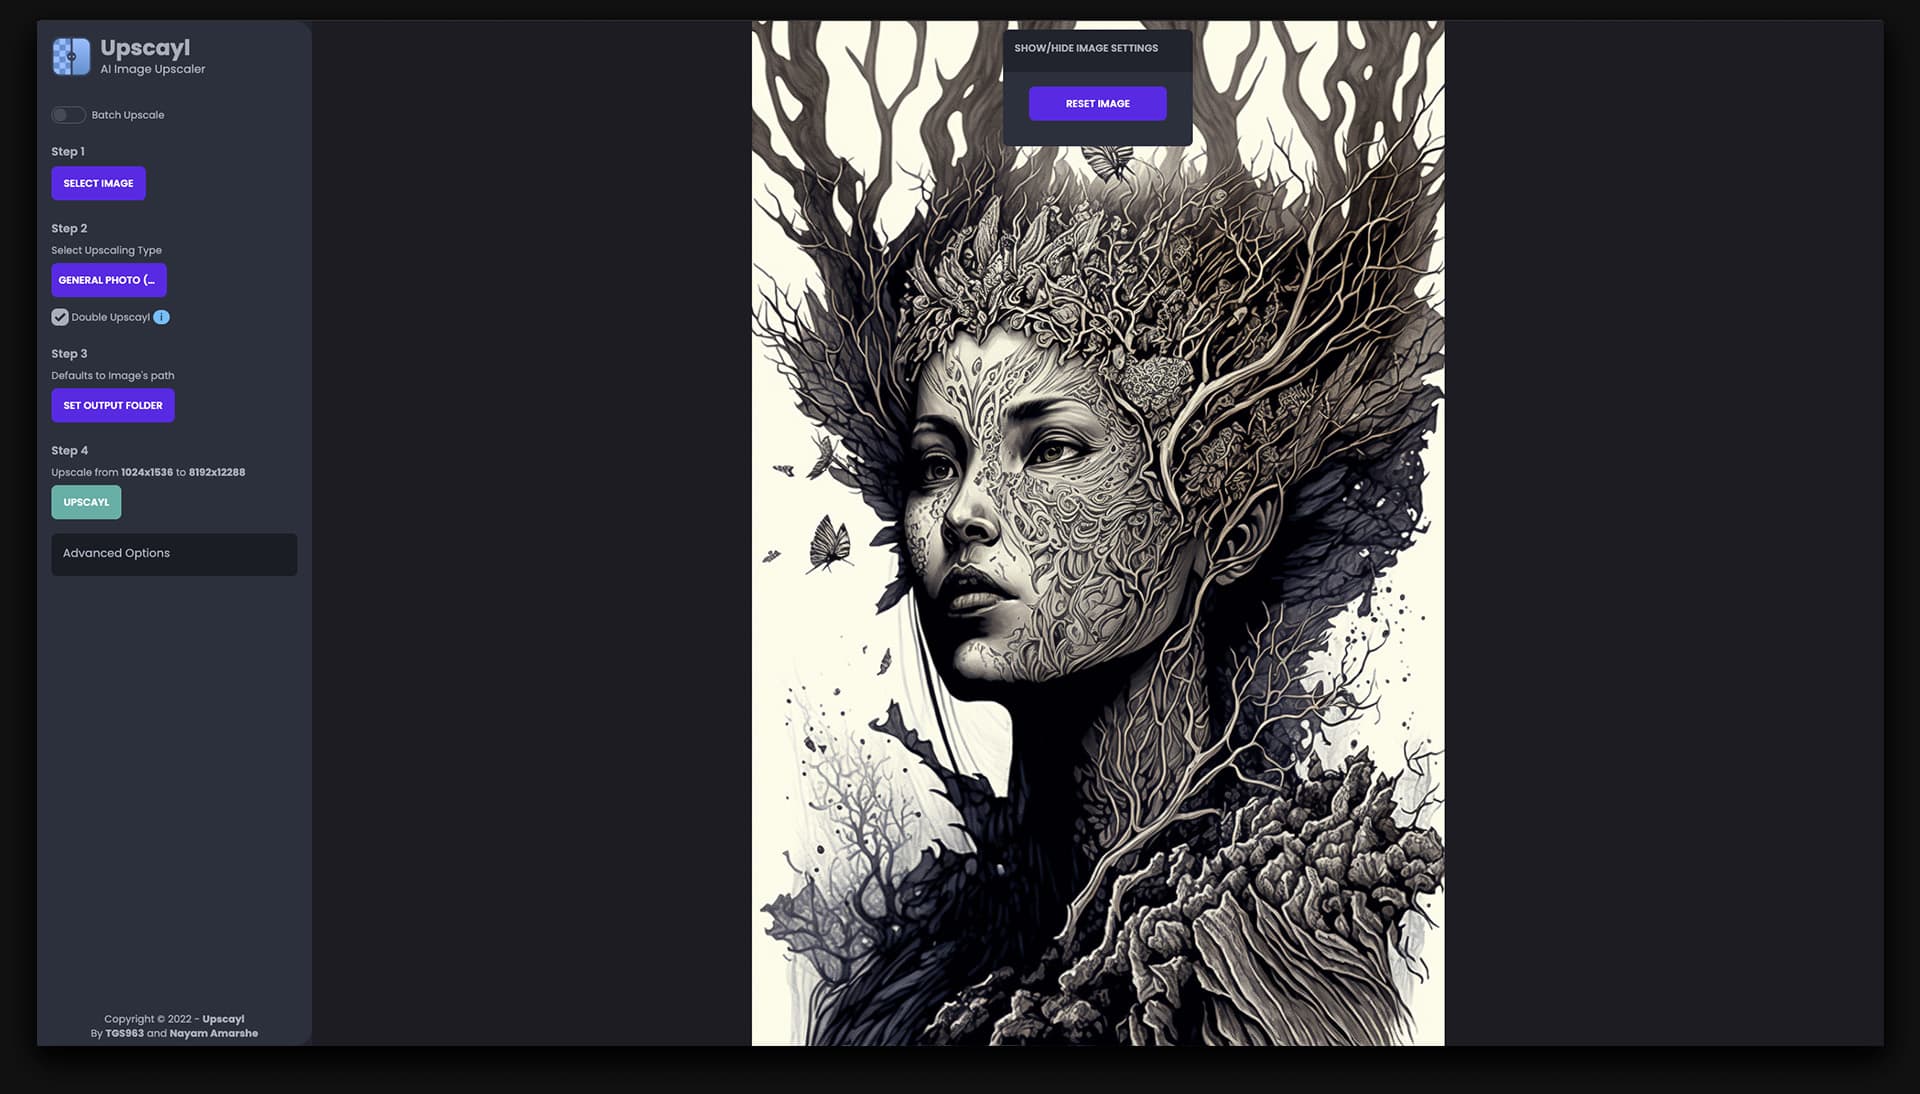
With its lightweight interface (maybe not the best one aesthetically ]:->), Upscayl offers a straightforward and fast user experience while utilizing advanced AI models and producing a decent result.
Capabilities
Speed: ~30-40 minutes per upscale.
PNG file size: ~65 Mb per image.
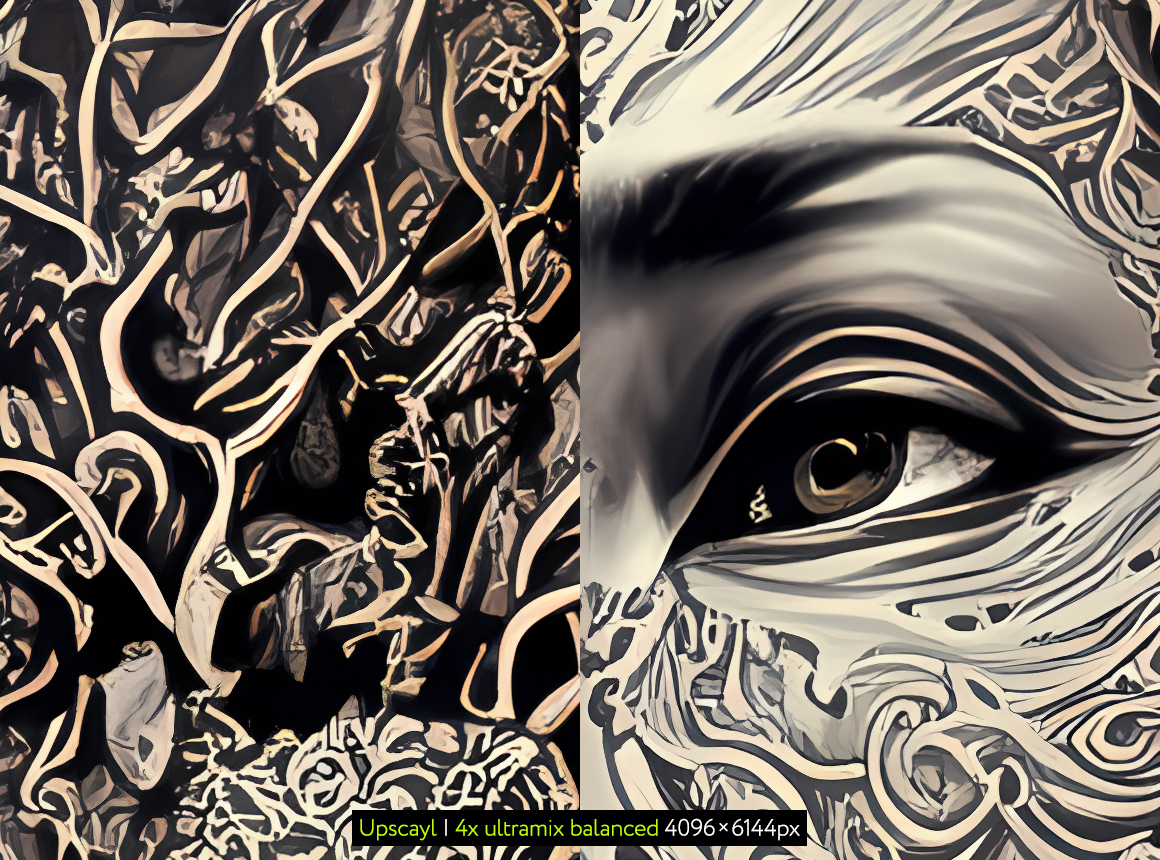
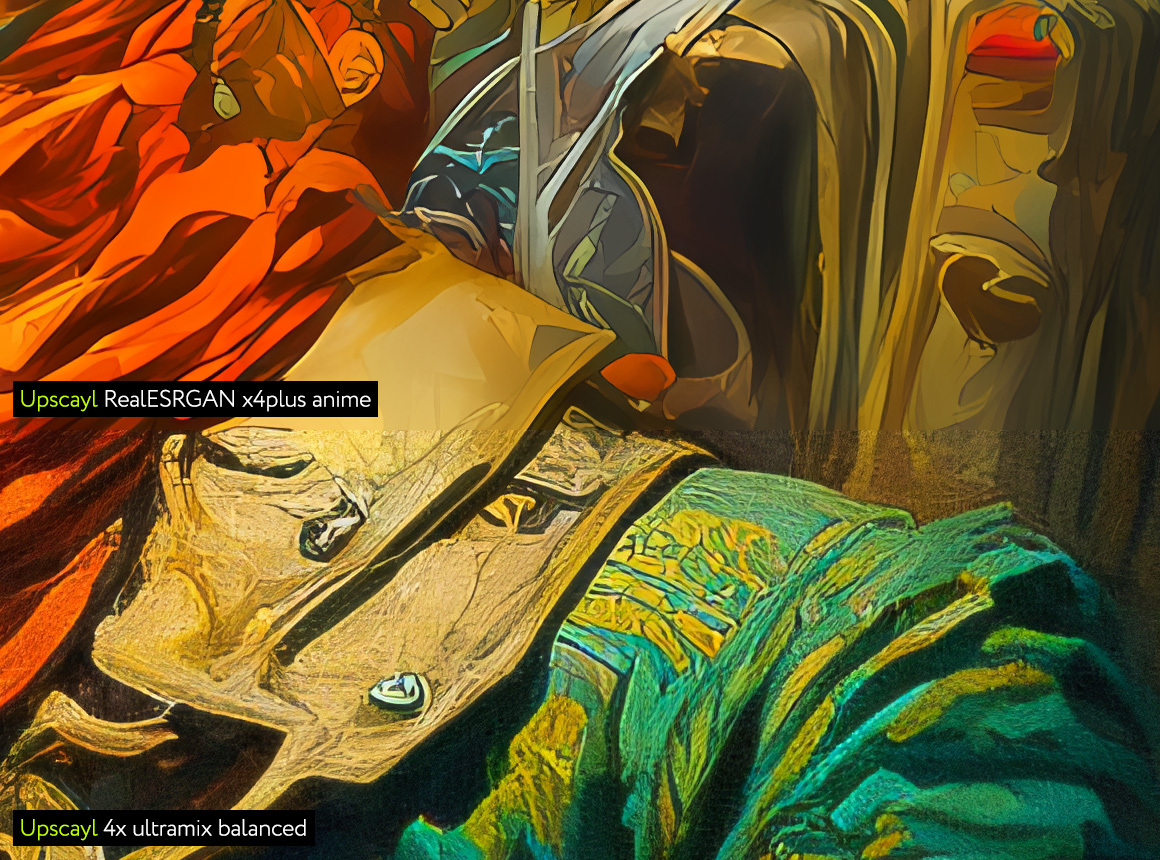
There are four models for general photo-realistic images and two special ones:
General Photo (Real ESRGAN, Remacri, UltraMix General, and UltraShrap).
Digital Art: an AI model trained specifically on architecture and objects.
Sharpen Images: trained on non-photographic images: computer graphics, fine art, drawings, etc.
Lightweight and easy-to-use interface.
Has a selection of models for various types of images.
Great for those looking for a basic but effortless upscaling.
You can use the same models as Upscayl with chaiNNer, where they are only 1/100th of its powers. and that gives much more versatility in configuration.
Verdict
Upscayl is a minimalist AND free tool that works! It has a small variety of preset models and almost no settings you can tweak. So simplicity and availability are definitely its strong points. It's not as versatile as chaiNNer, but it's definitely a better fit for someone who look for a more effortless and accessible instrument.
Printing,
finally!
For the final part of this test, I decided to see how Gigapixel AI upscales will behave on paper—with a particular focus on fine art prints. Each sample was printed at 300DPI on A3 size (297 mm × 420 mm, or 11.7 in × 16.5 in.)
Paper Stock
Printing enthusiasts and professionals know: you can emphasize any image's strong sides or conceal its shortcomings with the right choice of medium and printing technique.For this test I went with:
3D: Hahnemühle FineArt Baryta FB 350 gsm.
Geometrical Abstraction: Hahnemühle FineArt Torchon 265 gsm.
Line Art: Hahnemühle FineArt Photo Rag Baryta 315 gsm.
Paiting and Photograph: Hahnemühle FineArt Photo Rag Baryta 340 gsm.
All samples were printed on Epson SureColor P9570 Inkjet printer.
Conclusion
Gigapixel AI showed excellent results even on the most demanding paper. All prints turned out perfectly detailed, without artifacts or pixelation. A3 is a perfect size for both selling prints directly or exhibiting them at a gallery show (or on your wall!). And Gigapixel upscales absolutely shined as A3 pictures. However, my impression is that you can go at least 1,5x bigger without losing quality.
Happy midjourneys!
P.S. A very special thank you to Phil Akhnazarov for his help with overcoming chaiNNer! <3
Support Midlibrary
If you want to help us maintain and expand Midlibrary, produce more regular educational content of higher quality, and keep it free for everyone, please condsider joining our Patreon community.
Unless noted otherwise, all images on this website are created by the Midlibrary team using Midjourney AI and are not representative of real artists' works or real-world prototypes of the Midjourney styles used. Please respect the copyright—kindly ask us before re-using any materials published on Midlibrary.io.
♡

